3 Ways to Make Fabric Baskets
Get everything organized with a quick and easy fabric basket. I am covering three different methods to make your basket. Maybe you have some of these supplies and want to make a certain one.
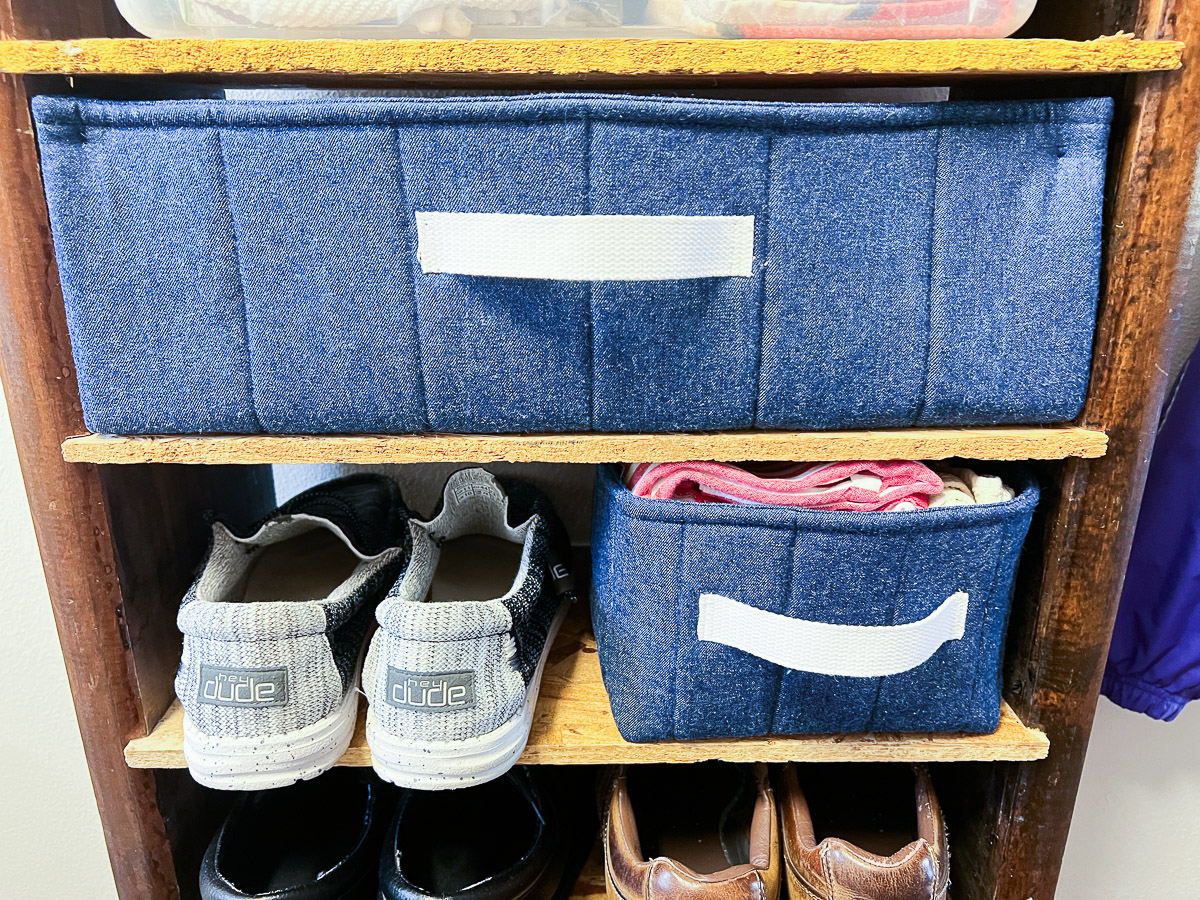
I needed organization on the shelves in my utility/laundry room, so I checked out different ways to make fabric bins.
Pick the one that resonates with you the most.
Read through the entire blog and/or pattern before beginning.
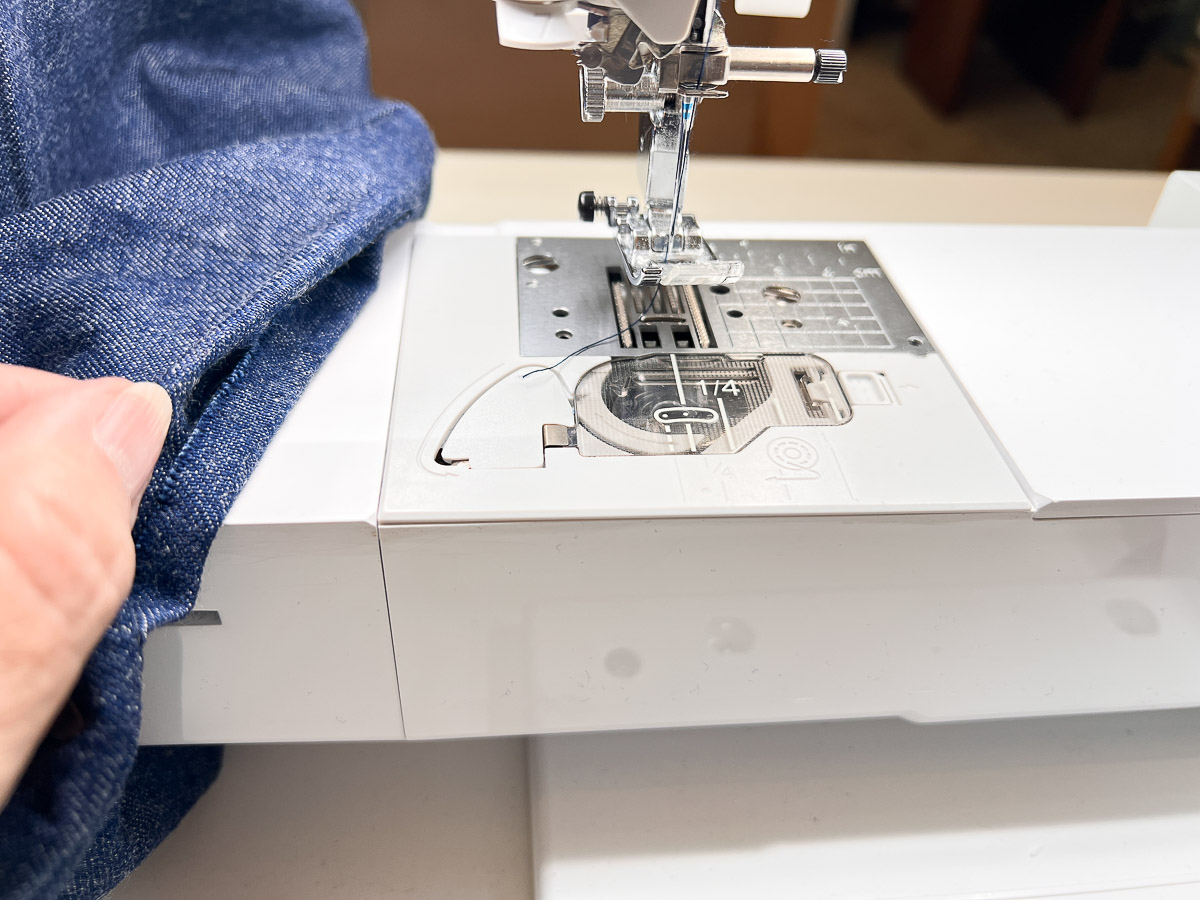
All seam allowances are 1/2”.
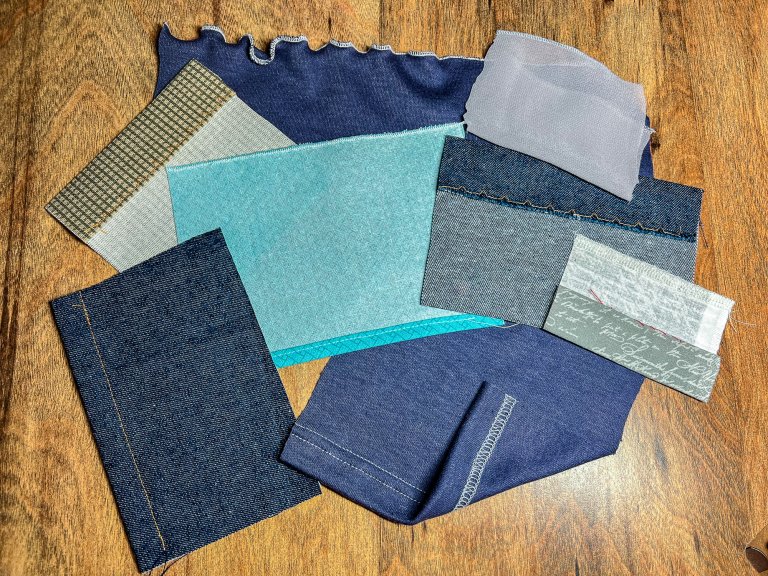
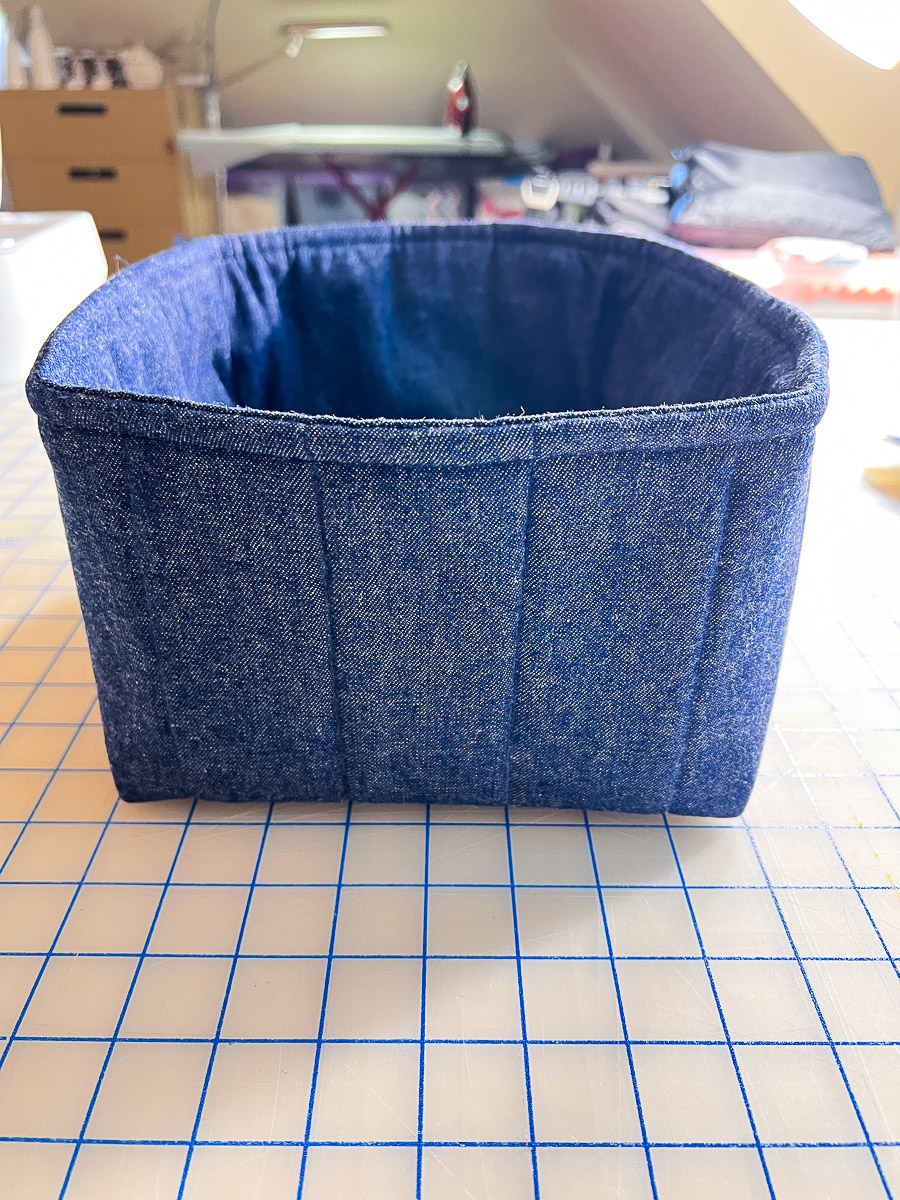
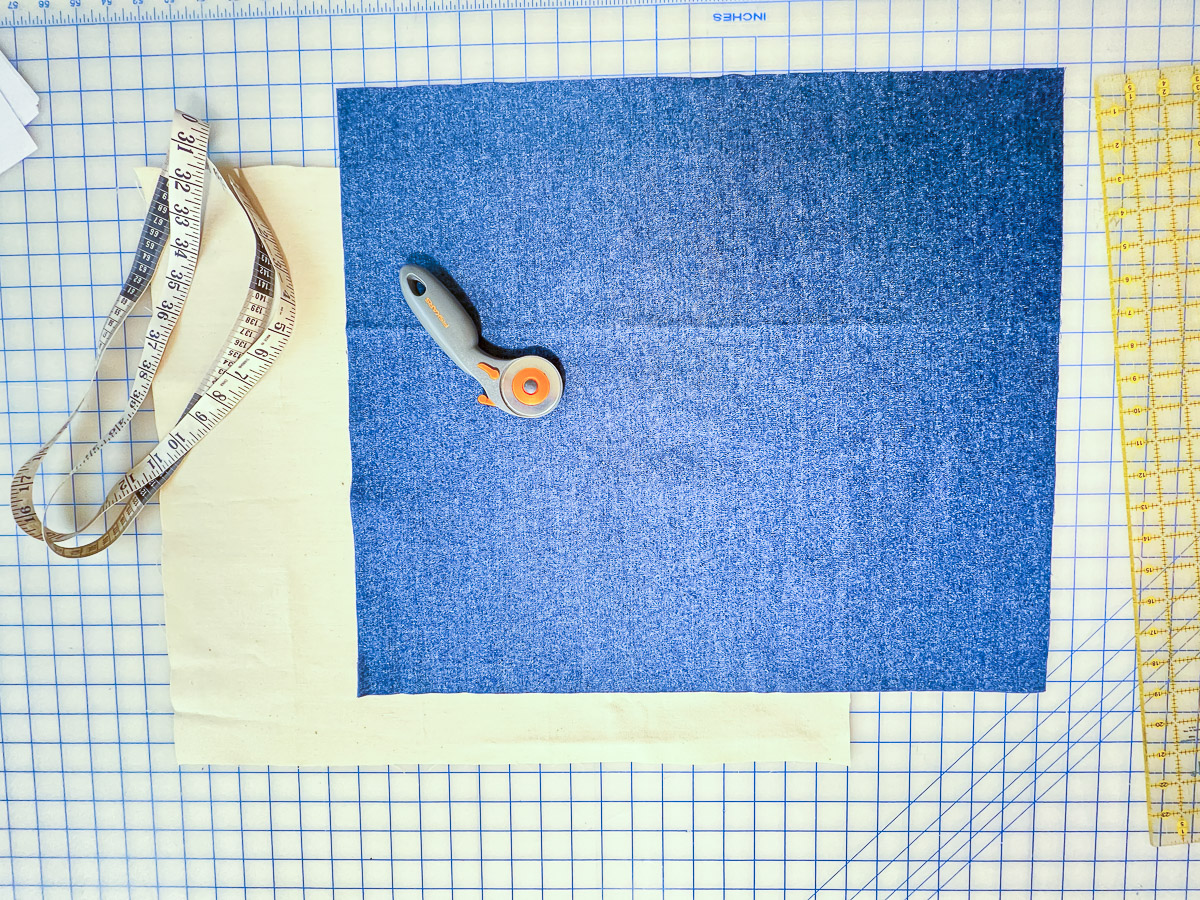
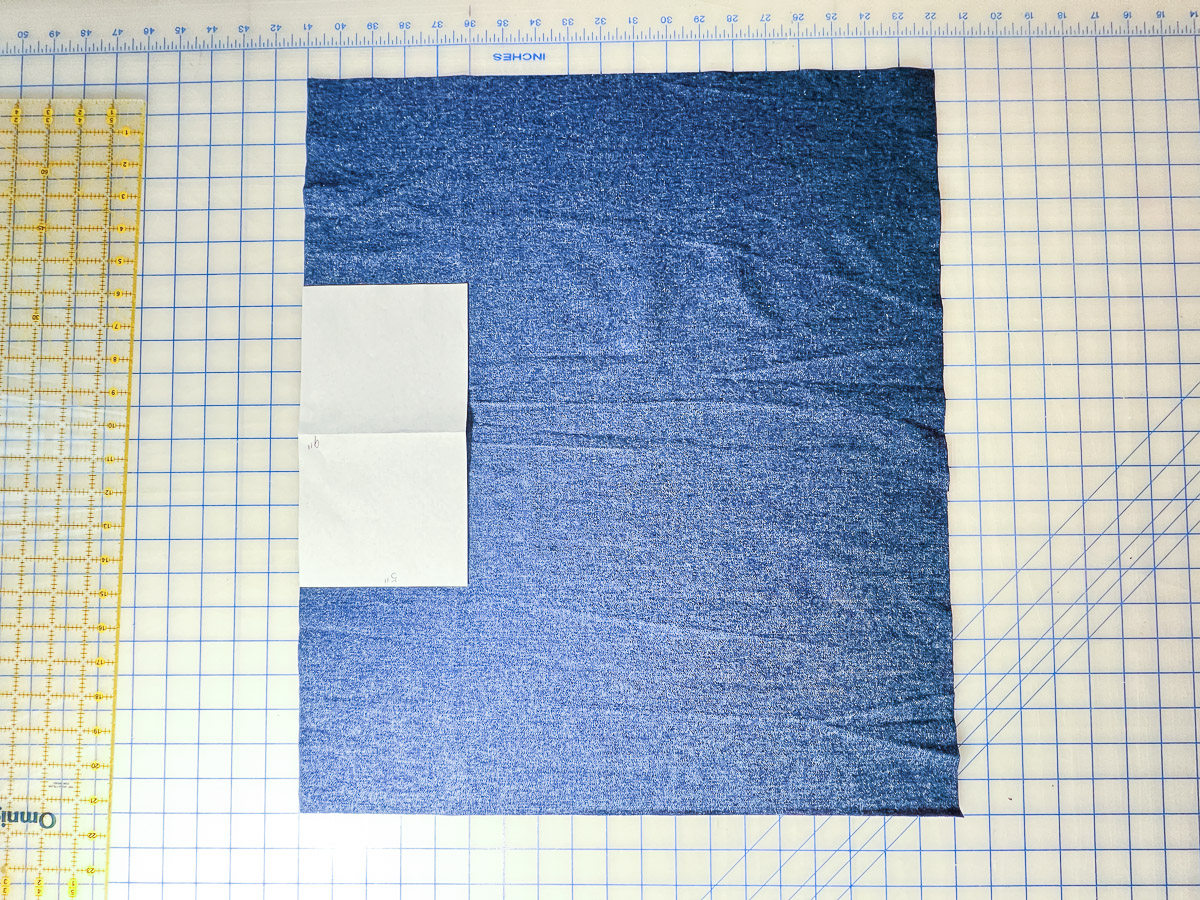
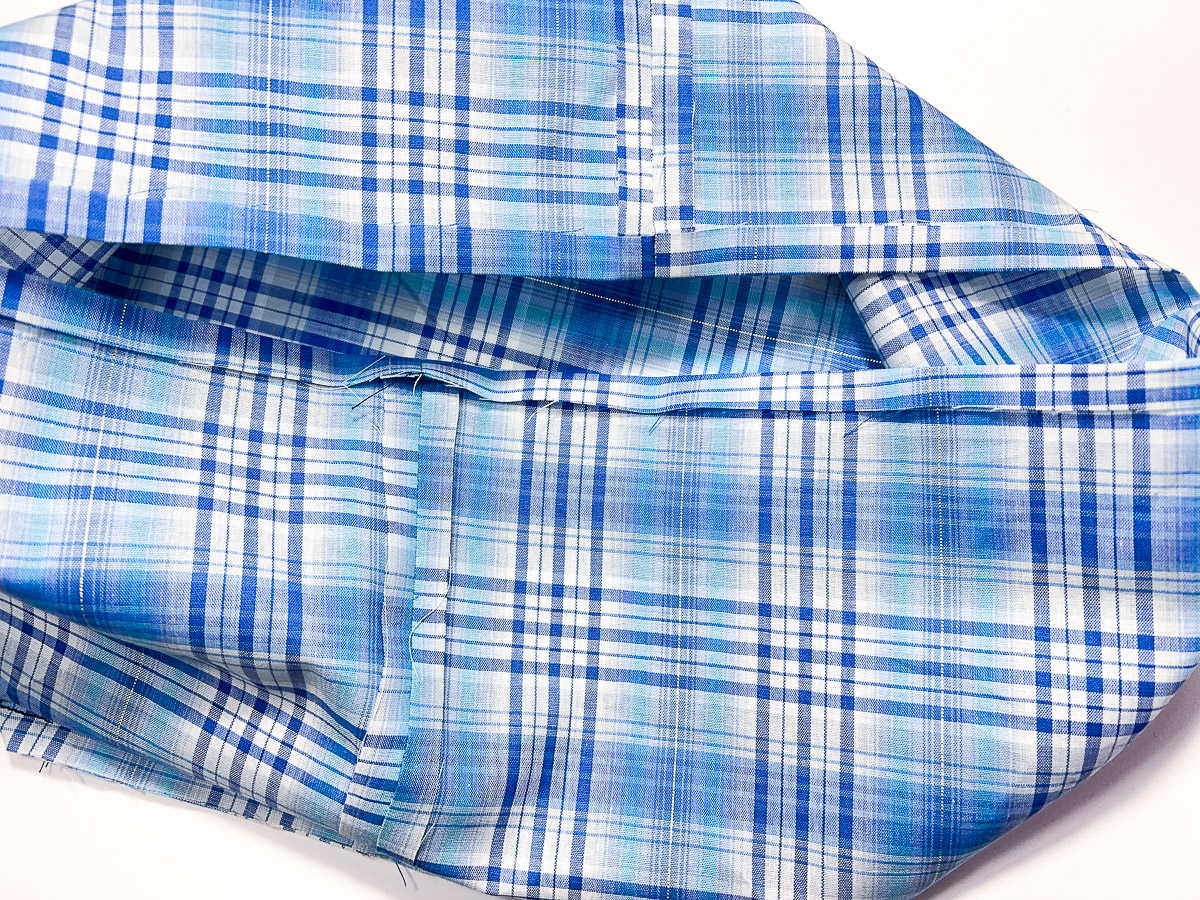
To be clear – the basket I needed was 8” wide x 10” depth x 6” high. I used some denim that I had.
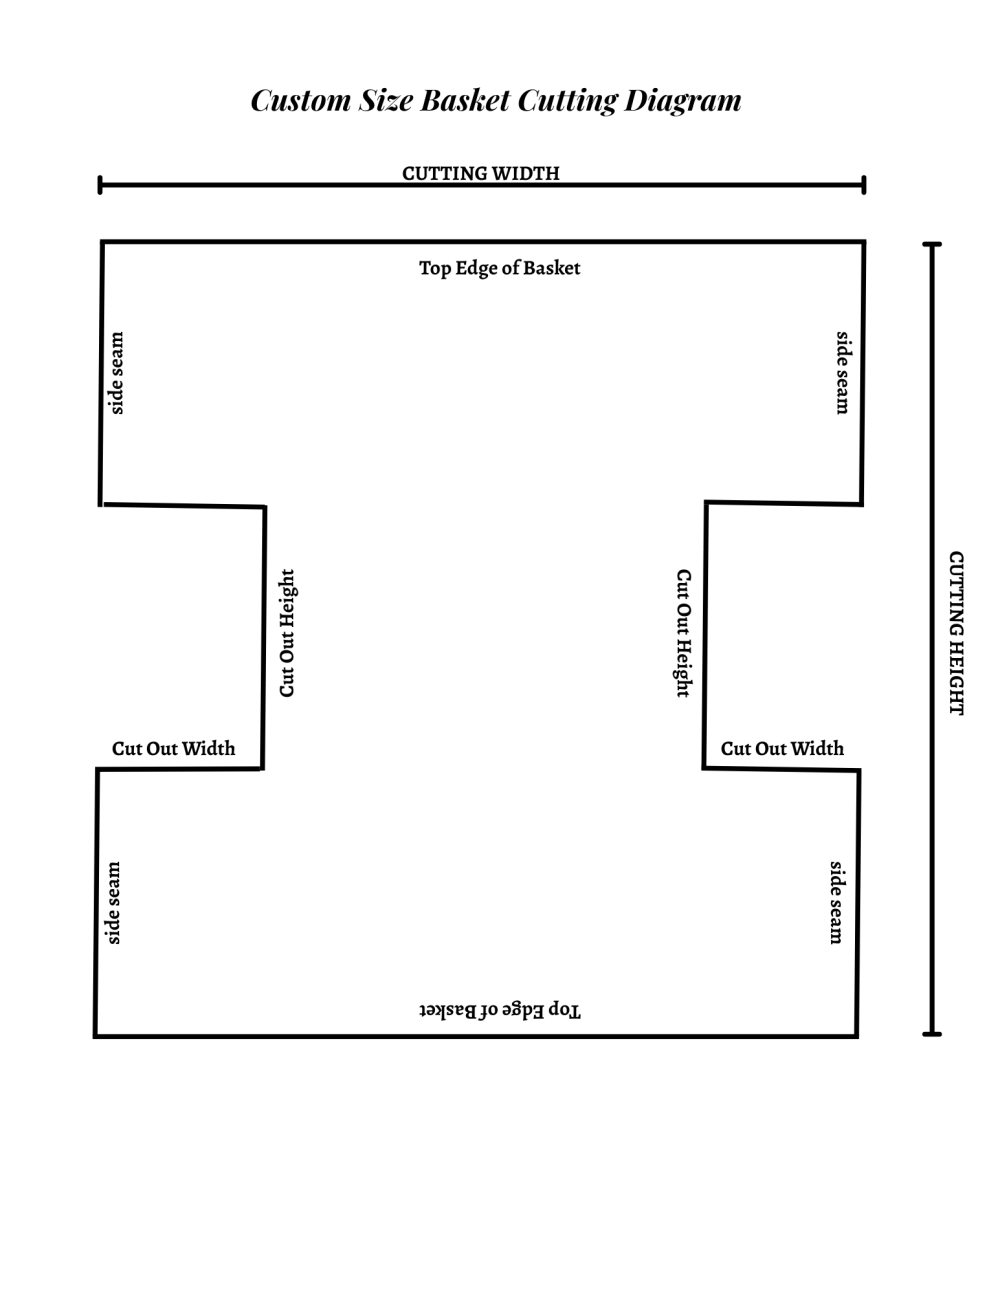
So I had to reverse engineer my measurements to cut it out. There is a Custom Cutting Diagram towards the end of this post.
The people I followed to make the three baskets were:
Sister Chicks Quilting, SewCanShe, and Lillyella Stitchery
There are Amazon Affiliate Links in this post. If you click on one and purchase, I may earn a small commission. You are appreciated!!
Basket #1
Supplies:
Fabric
Fabric for lining
chalk marker or fabric marking pen
Heavy duty needle, 90/14 or larger
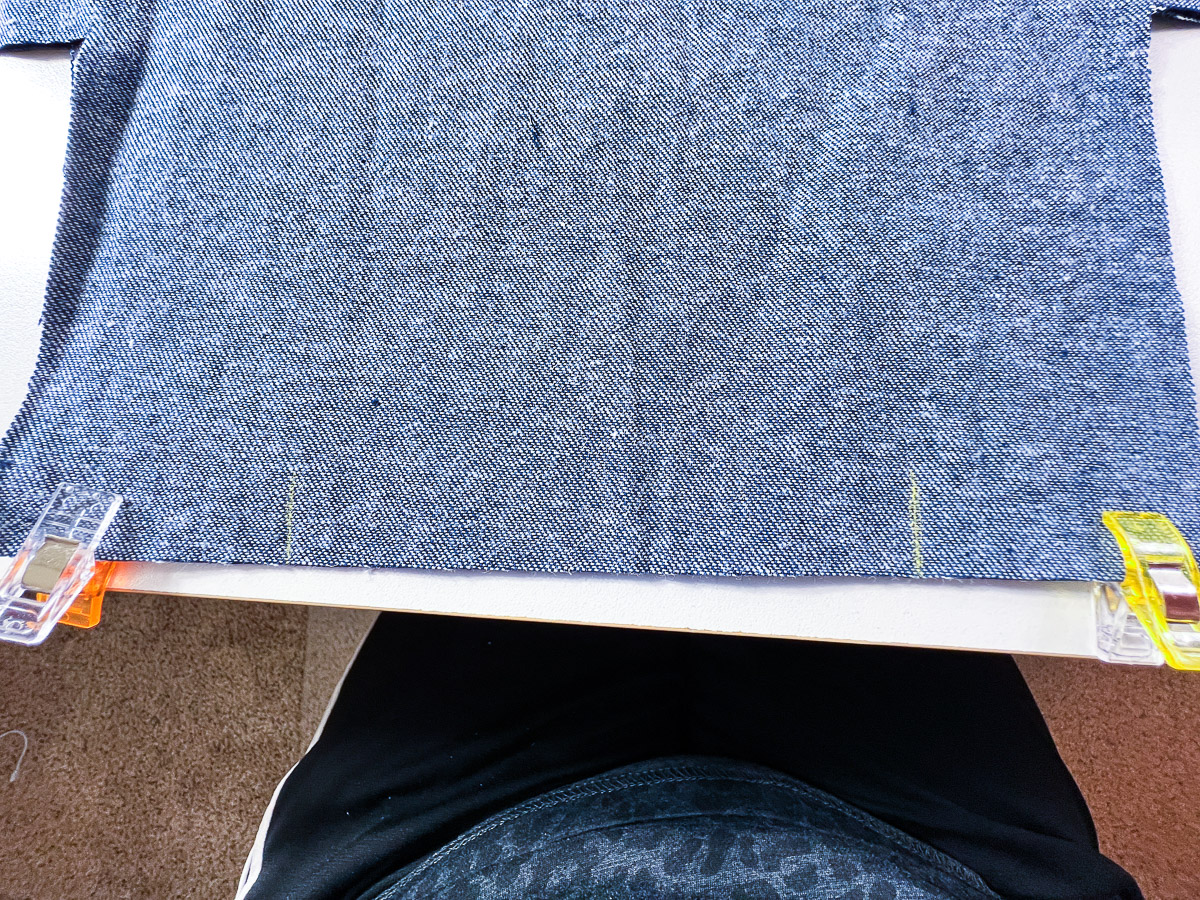
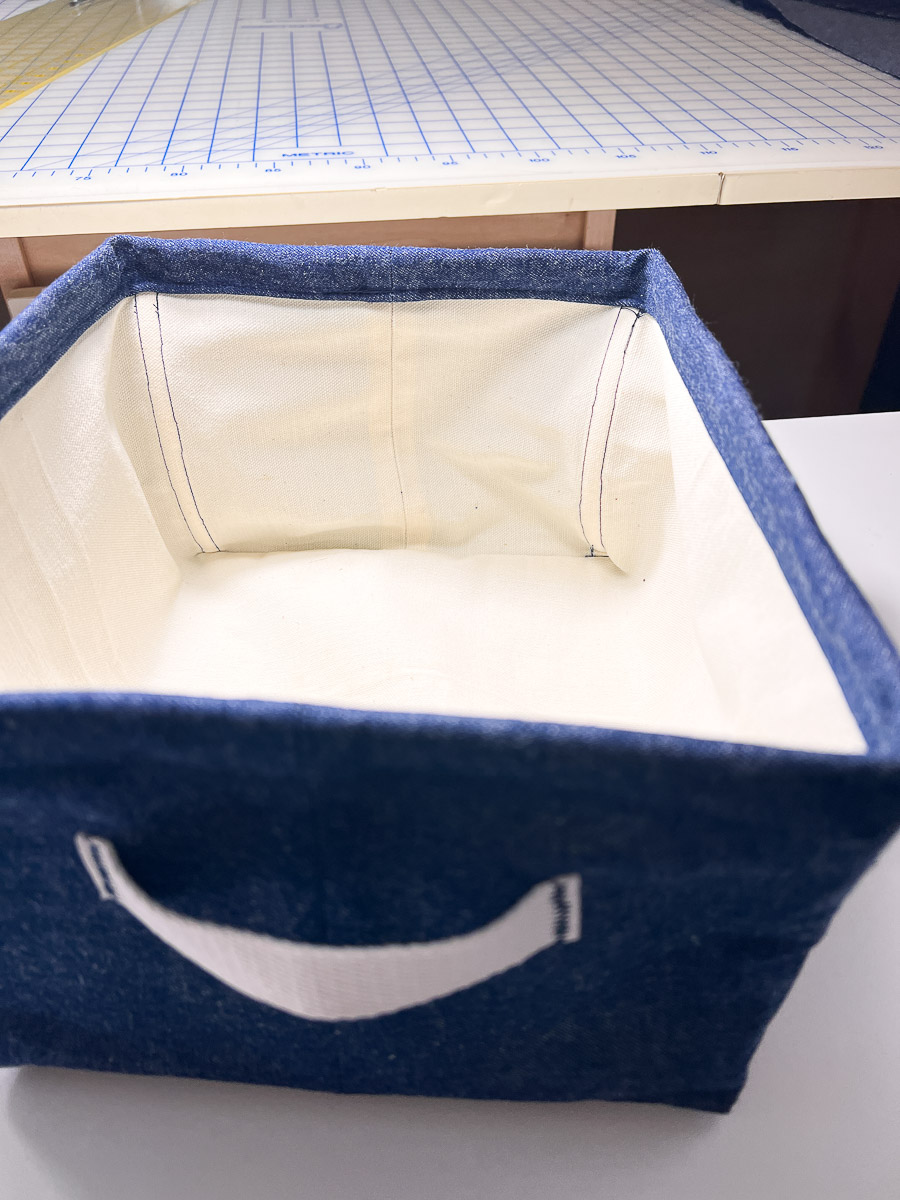
For my basket above, all my pieces were cut at 19” x 21”
Cut (2) out of fabric, (2) fabric lining, (2) Bosalfoam, and (2) Fusible fleece.
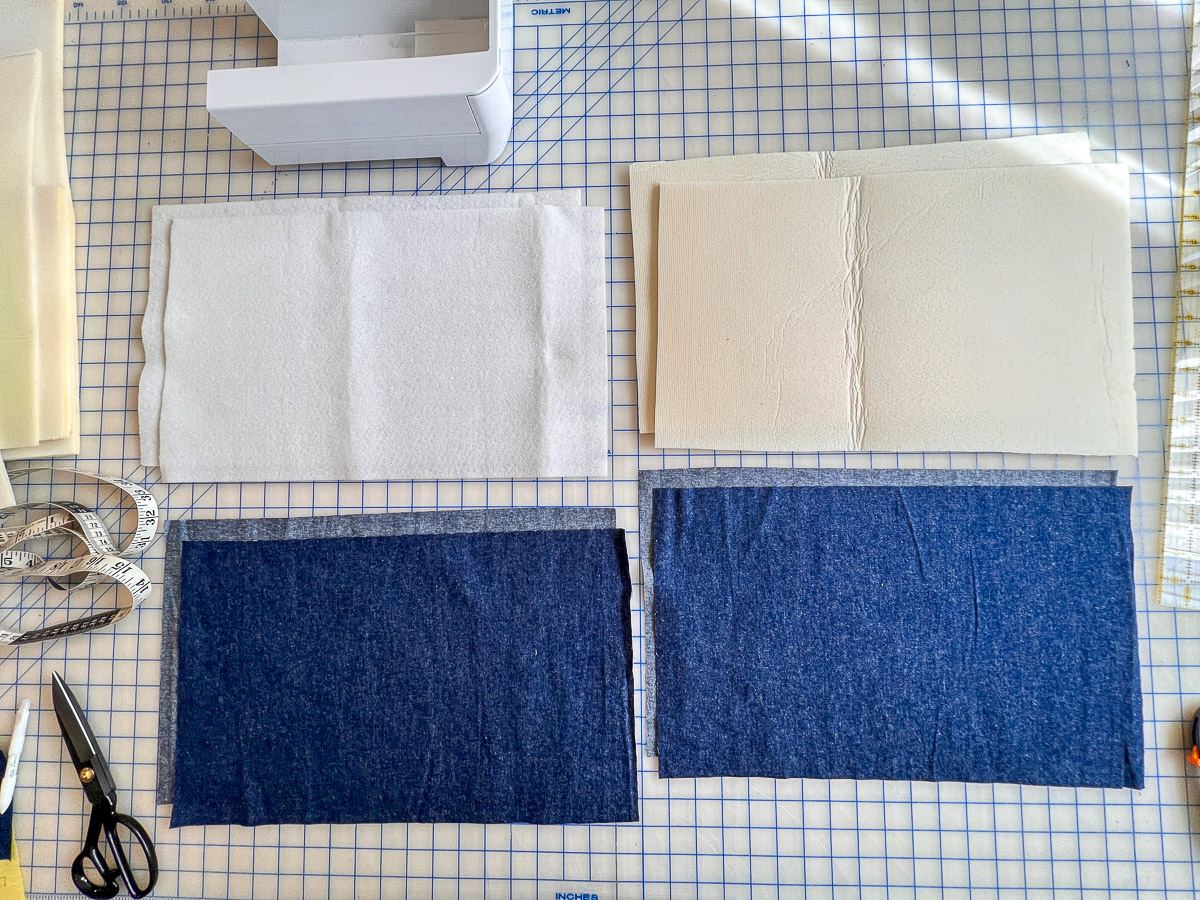
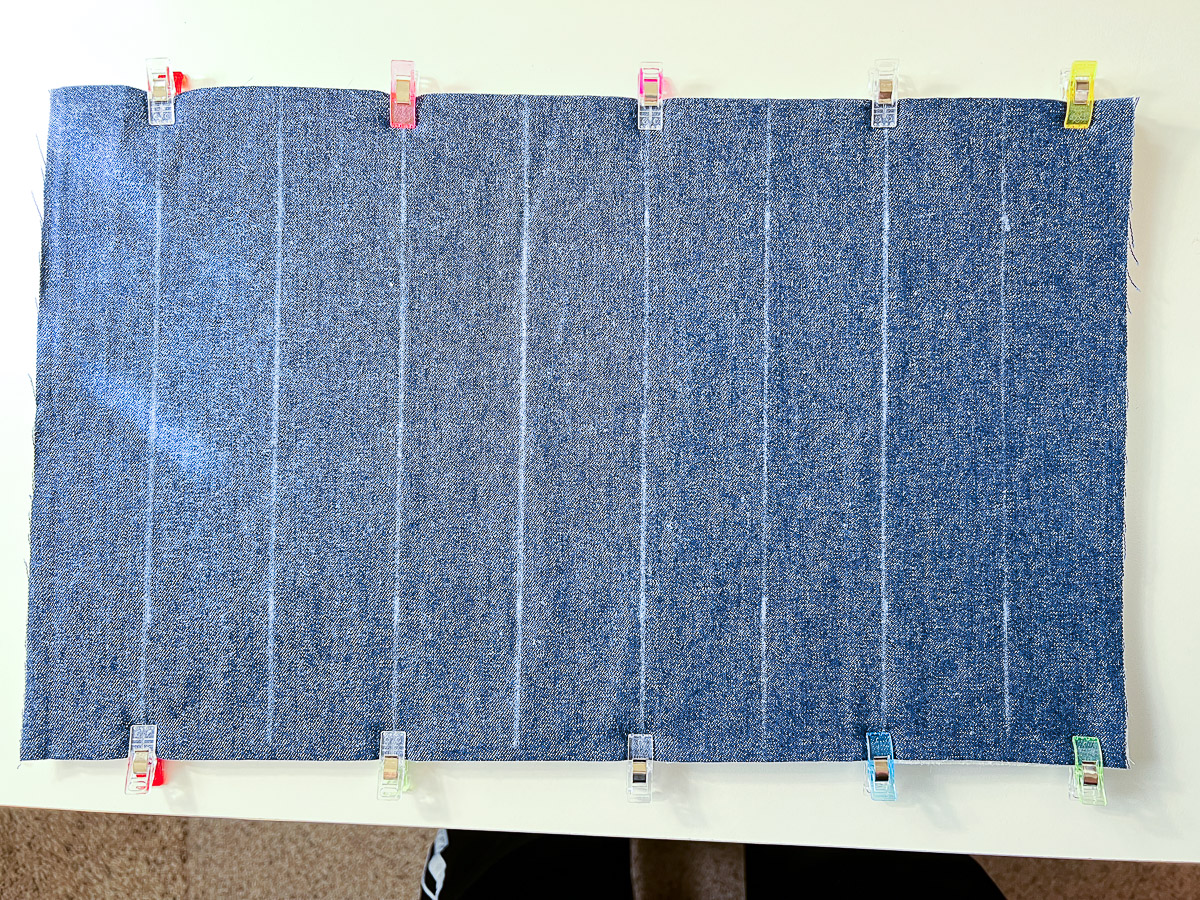
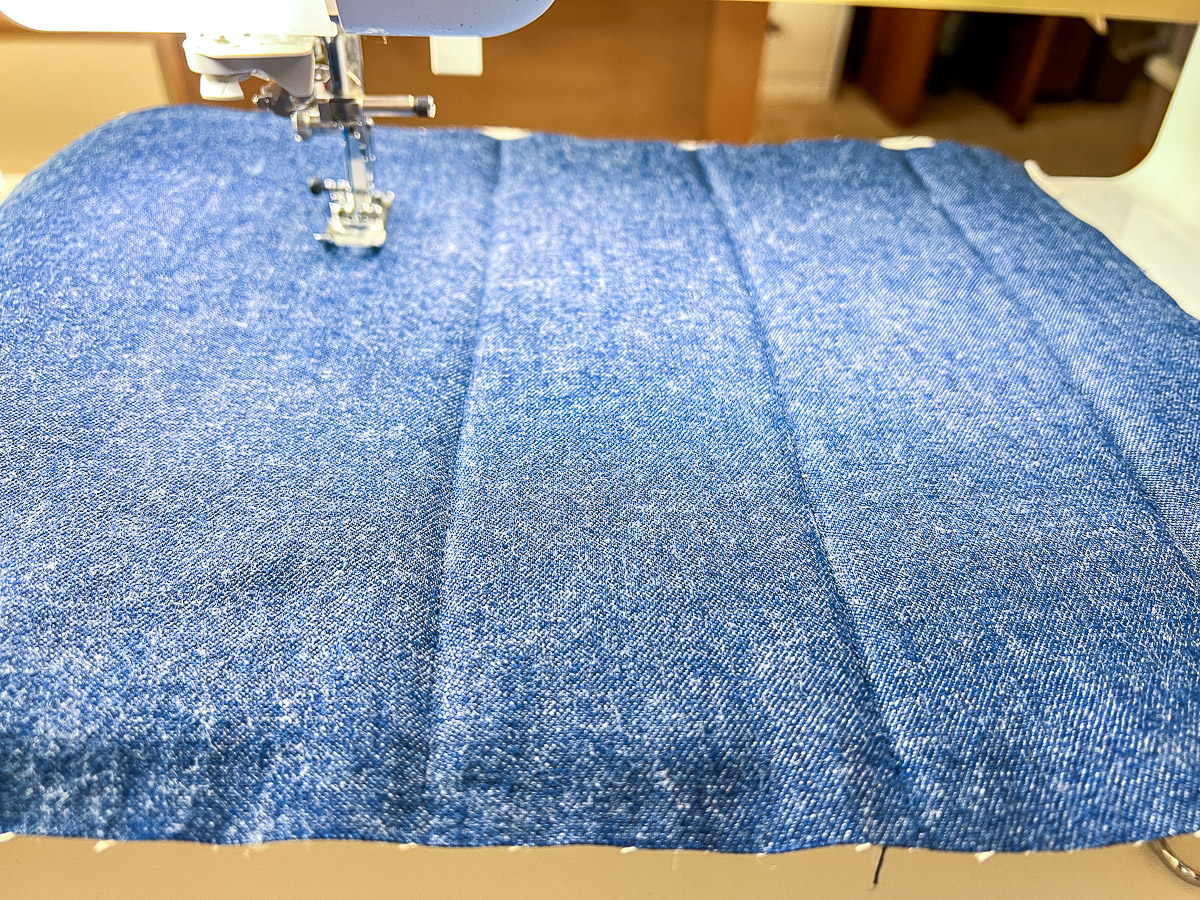
Mark and quilt lines down your fabric, Bosalfoam, and fusible fleece.
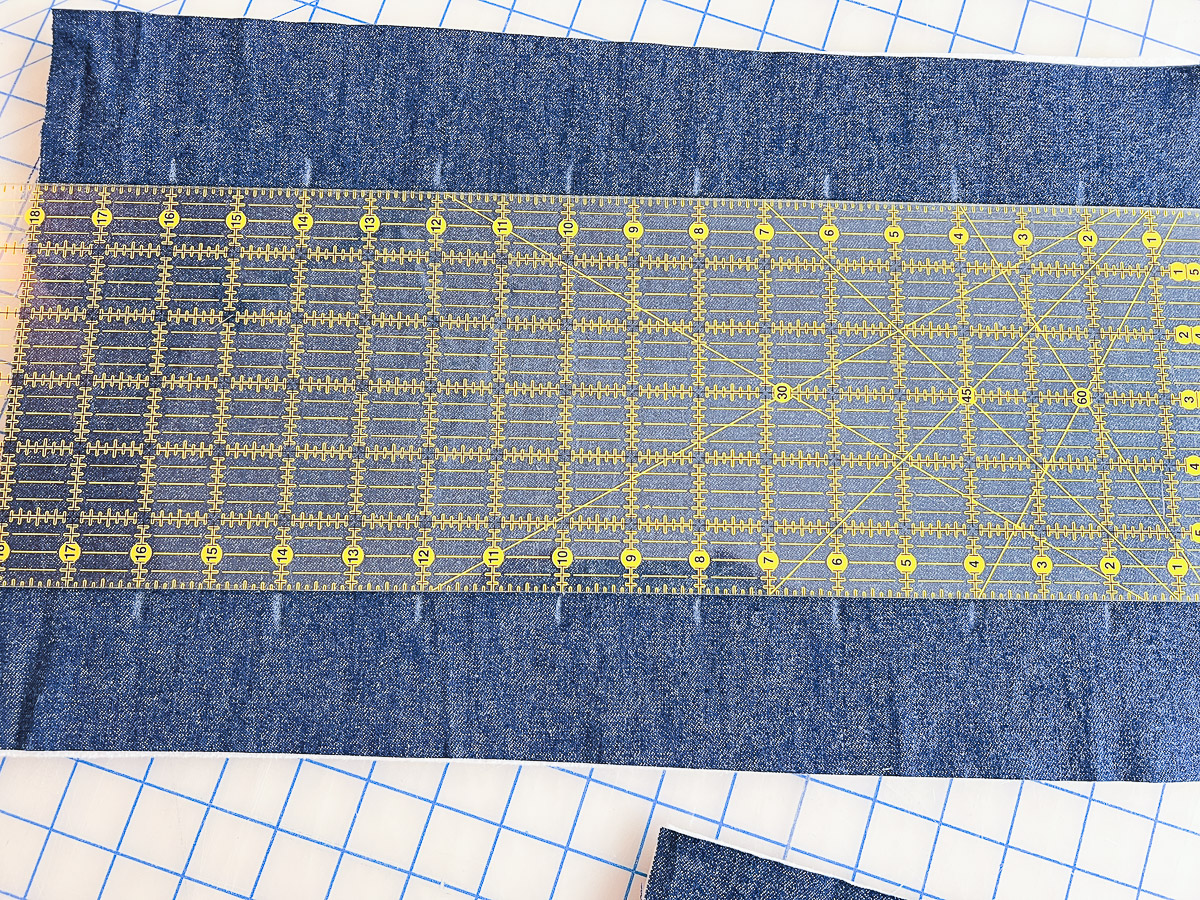
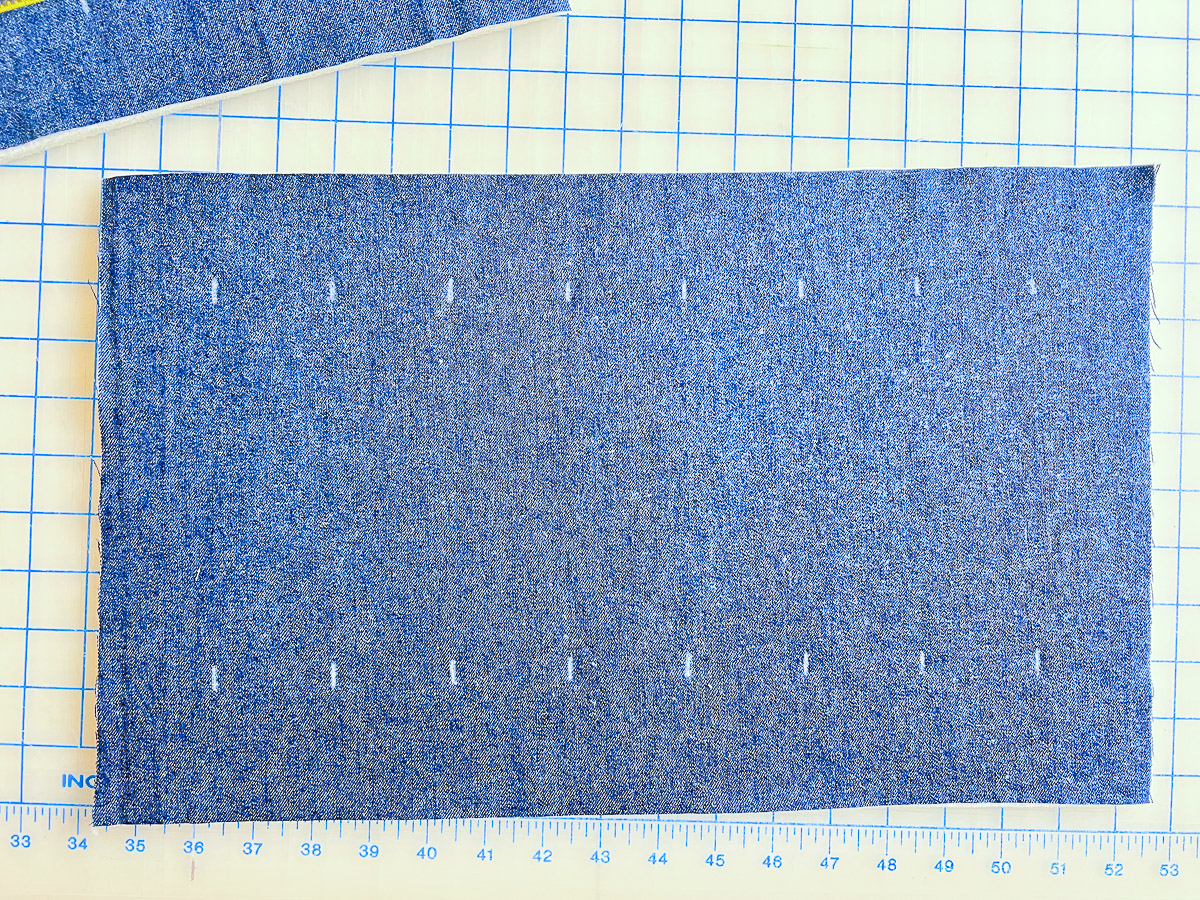
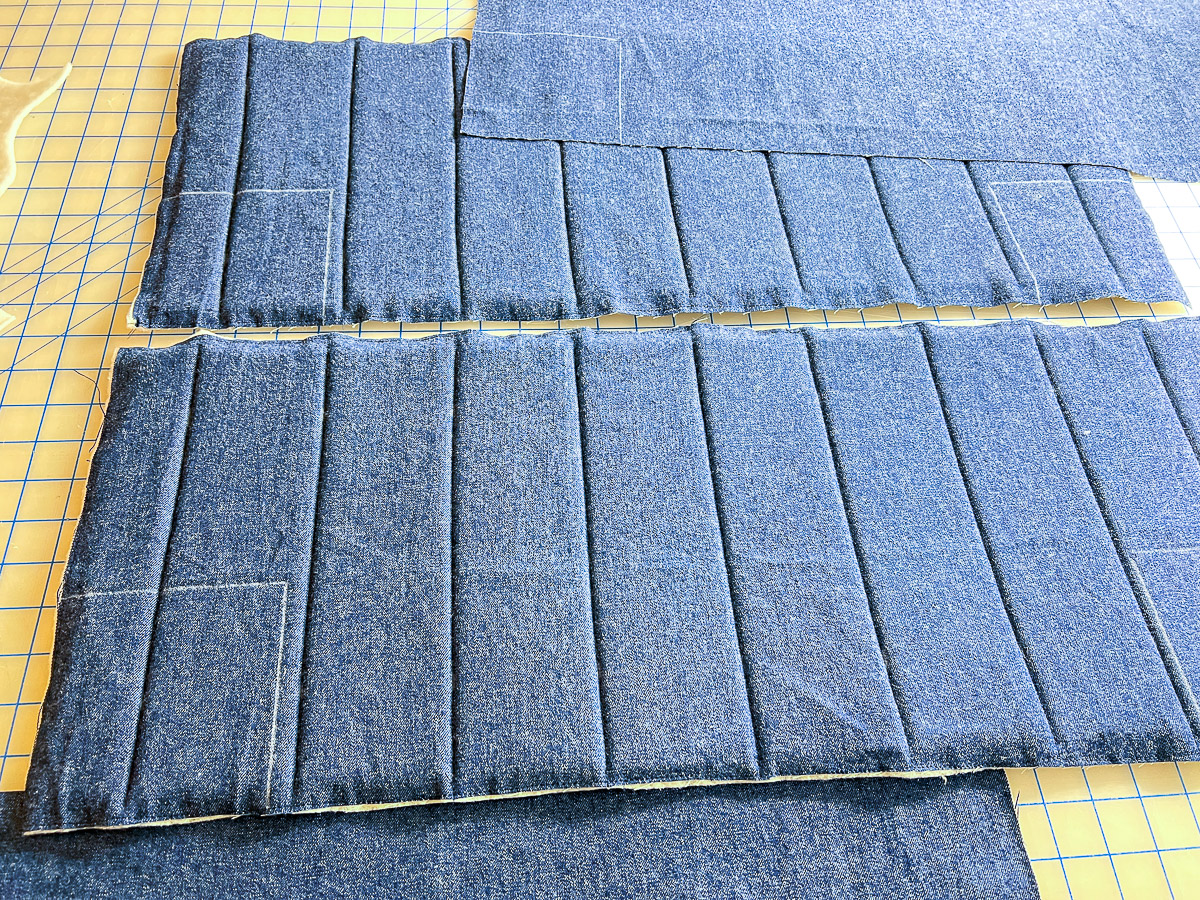
Mark and cut out the rectangles for the boxed corners. Mine were 4 1/2”.
Sew the side seams.
Sew the bottom seam.
On Lining, sew the side seams.
On Lining, sew the bottom seam leaving an opening to turn.
After that, bring the corners together with the side seams to close the boxed corners.
Repeat on lining.
Turn lining right side out.
Put lining and outer fabric right sides together and sew around the top.
Next, turn right side out.
Sew opening in the lining together.
Clip around the top edge and topstitch sewing 1/2” seam.
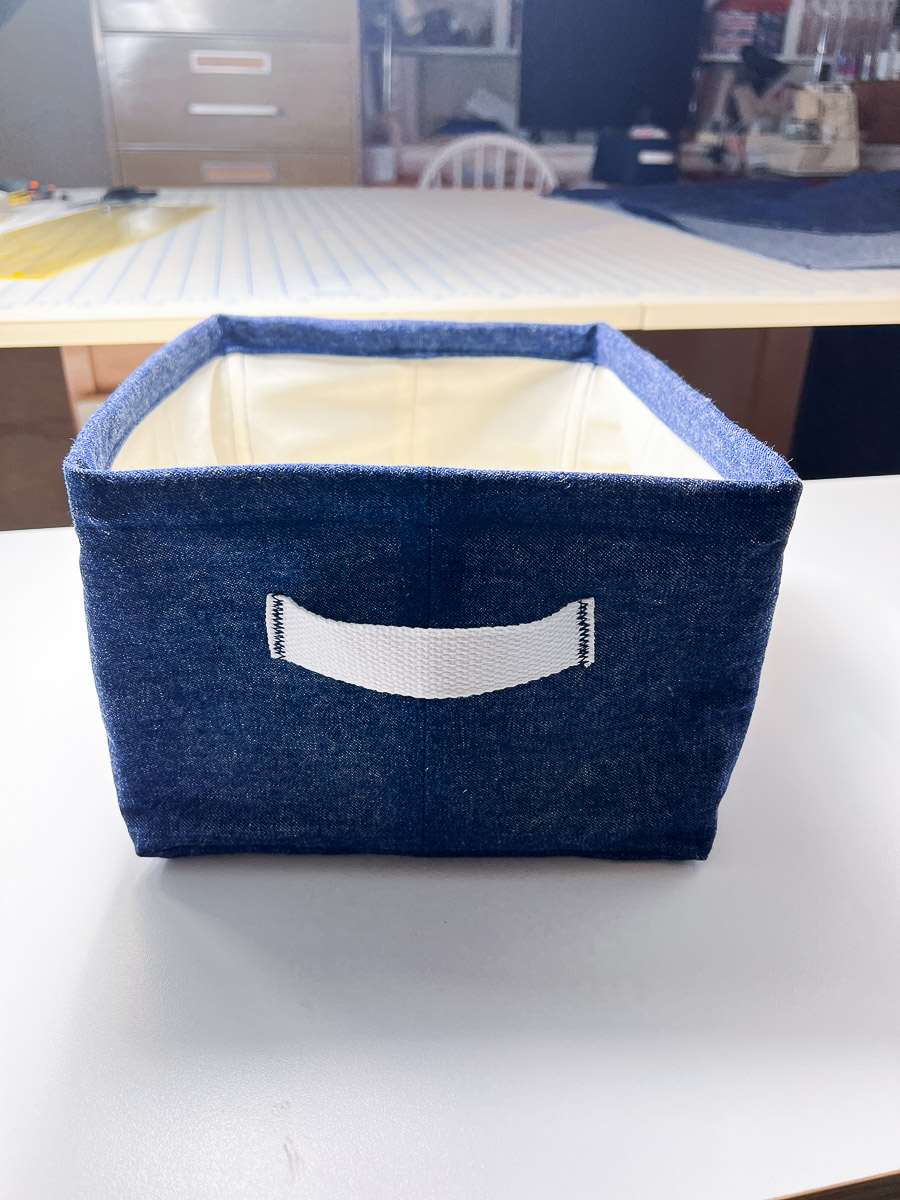
Optional – sew some webbing on for a handle.

This basket was my second favorite. I really enjoy the thickness of the Bosal foam.
Also, I made a larger one.
Basket #2
Supplies:
Fabric – 1/2 yard
Cotton duck fabric for lining – 1/2 yard
12 gauge aluminum crafting wire for the rim
Chalk marker or fabric marking pen
Wire cutters
Heavy duty needle, 90/14 or larger
For my basket above, all my pieces were 19” x 22”
Cut (1) out of fabric, (1) fabric lining
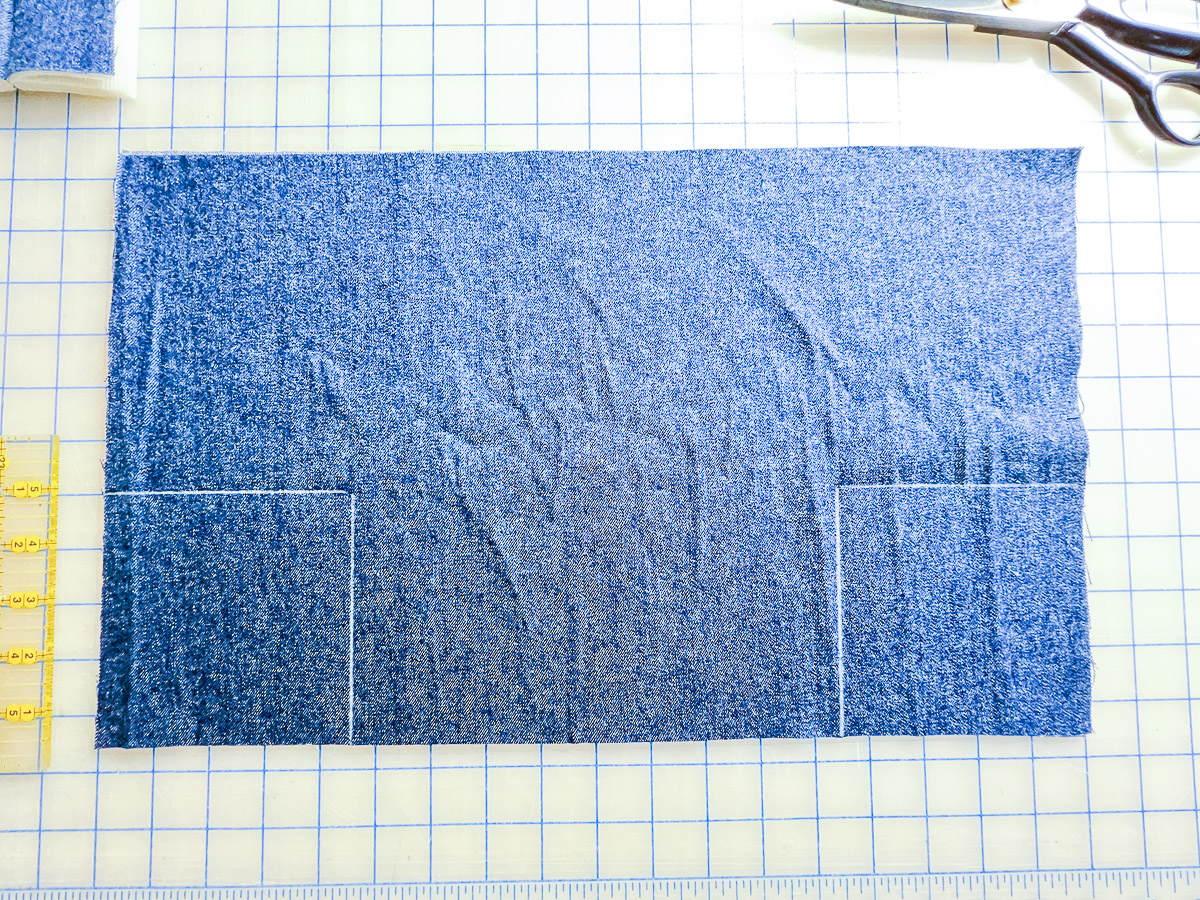
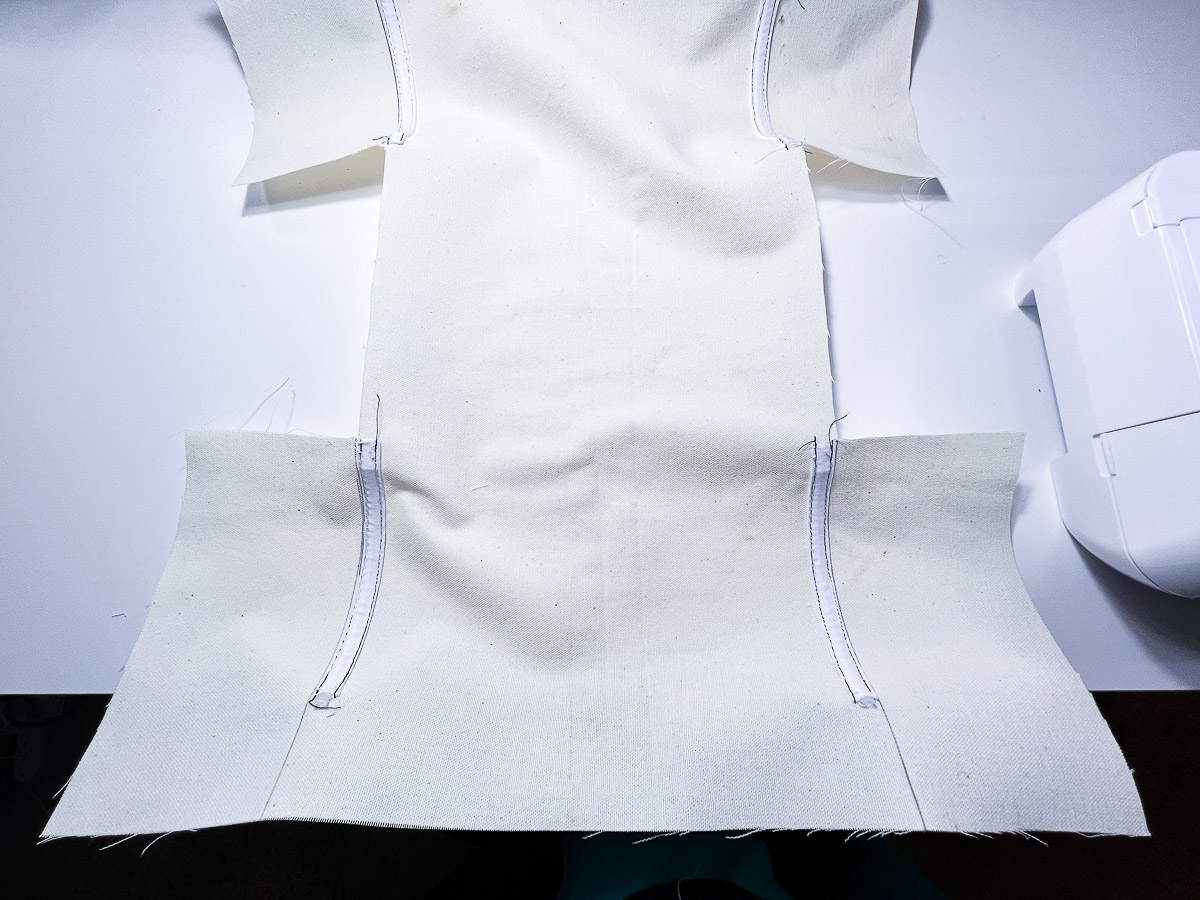
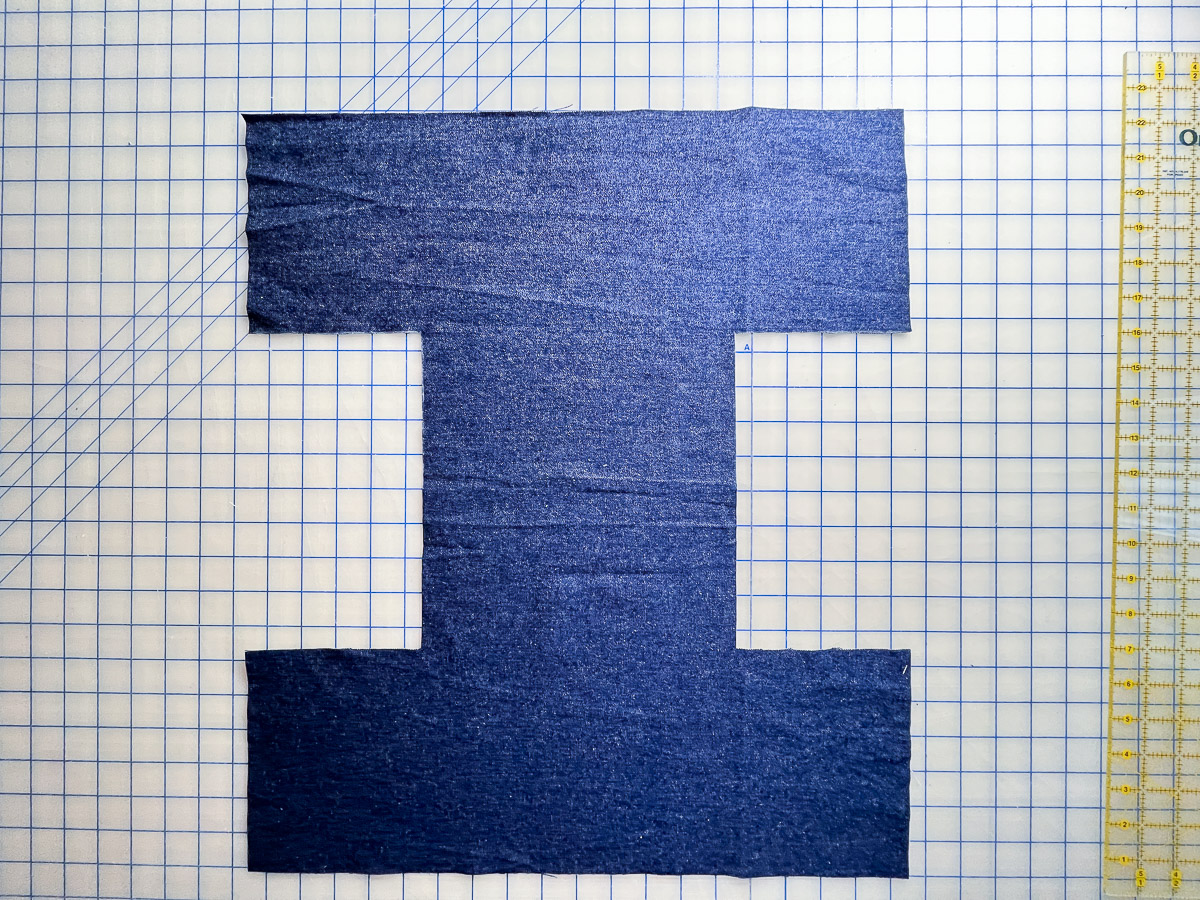
Fold the 19” x 22” fabric rectangle for the basket exterior in half with the long 22” edges together. Use the fabric marking pen or chalk to mark an almost square to cut out of the lower corners at the folded edge. Mine was 5” x 4 1/2”.
(There is a cutting diagram towards the end of the post to make your custom size.)
The cut-out piece should be 5” wide and 4 1/2” tall before you unfold it. Unfolded, it was 5″ x 9″.
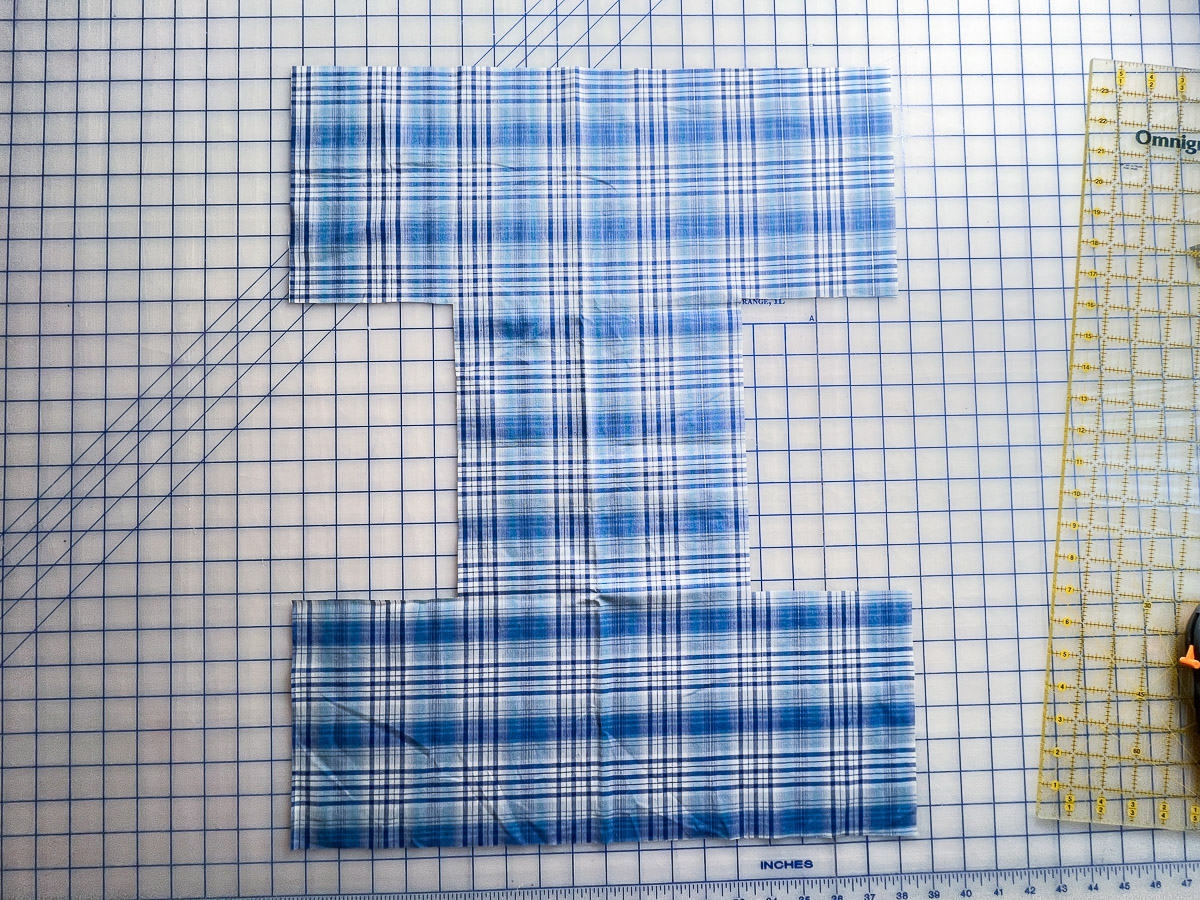
Repeat to cut the same shape from both lower corners of the cotton duck canvas piece too.
Use the wire cutters to cut a 38” piece of wire.
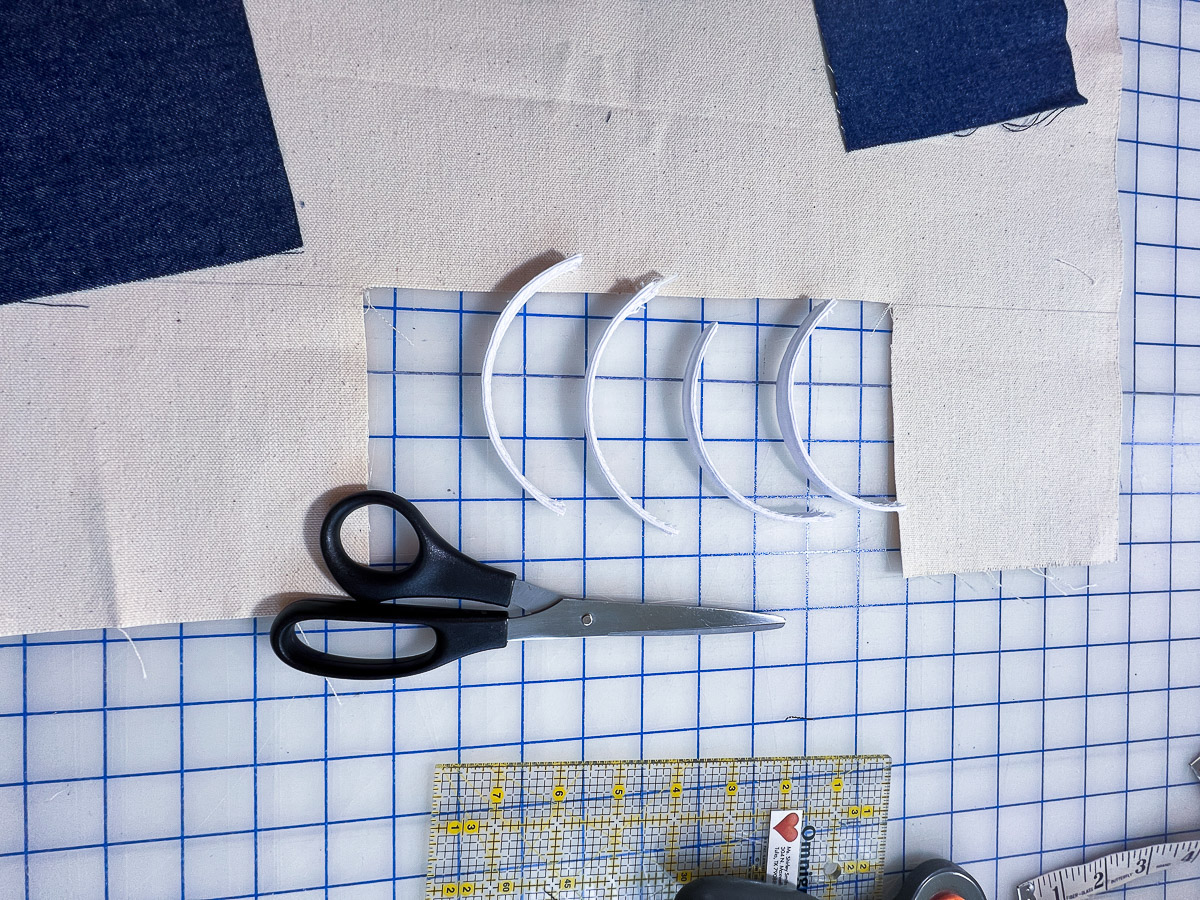
Cut 4 pieces of boning, each 5 1/2” long.
Sew in the Boning
Unfold the cotton canvas fabric piece with the corners cut out.
Use the fabric marking pen to draw lines 5” away from each side edge.
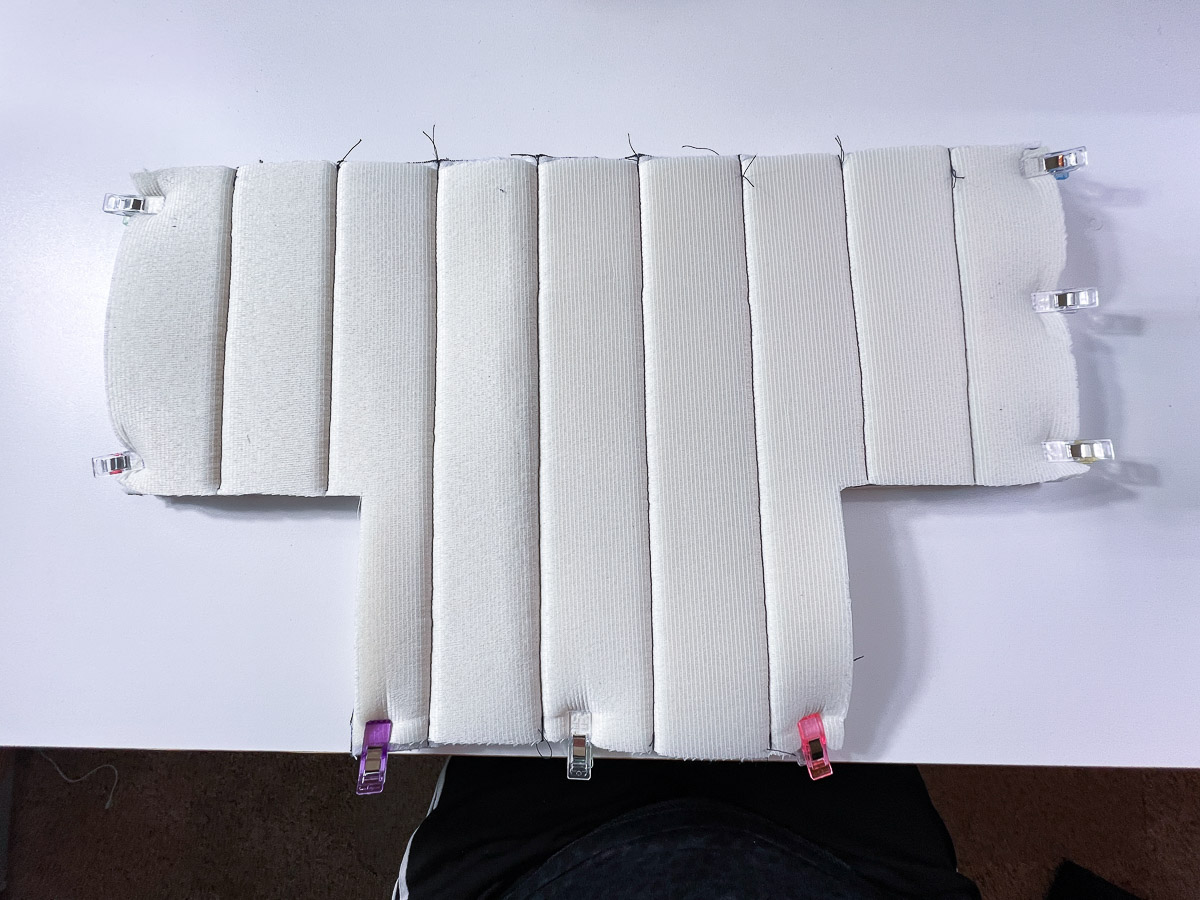
Cut away 1/2” from the plastic inside each boning piece so that there won’t be plastic in the basket bottom seam allowance. To do this, scrunch up the fabric casing over the plastic in each boning piece until you can pull the plastic out by about 1/2”. Cut off 1/2” of the plastic and push back into the casing. At one end, the boning piece will be soft because it won’t have any plastic.
Sew the four pieces of boning to the wrong side of the lining piece. The boning pieces are sewn against the inside edges of the marking lines. The soft ends of the boning pieces (with no plastic inside) are lined up with the horizontal edges of the cut out corner sections.
Stitch on both sides of the boning piece right on top of the topstitching that is already on it. Sew all four on.
Sew the Basket Together
Fold the outer fabric piece right sides together with the long edges. Stitch the side edges with a 1/2” seam allowance.
Sew the side edges of the lining the same way.
Press the seams open.
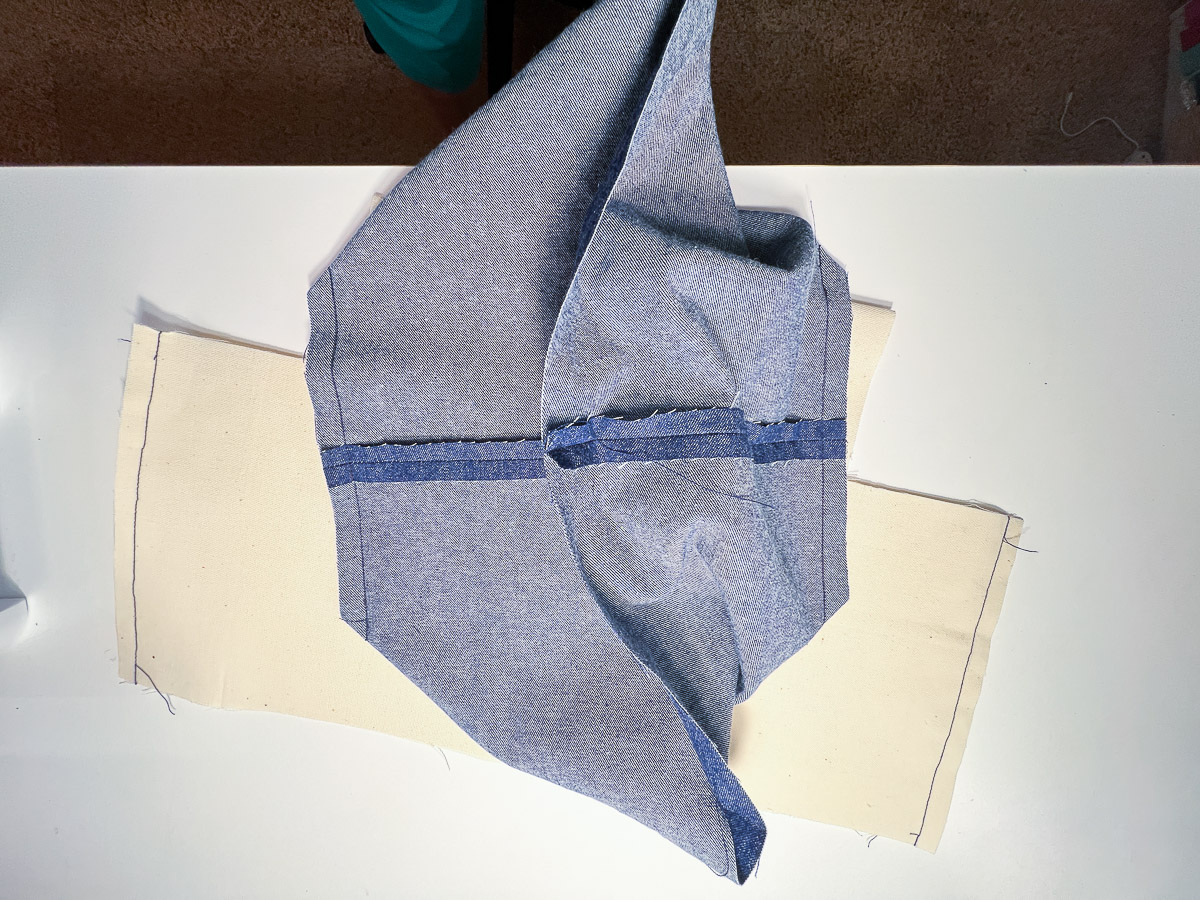
Arrange the outer fabric with the side seams flat against the middle of the basket piece.
Pin and stitch the corners with a 1/2” seam allowance.
Repeat this step with the basket lining.
Next, sew the bottom corner seams together so your basket won’t have a baggy lining.
Place the lining right side up on your table with the side seams facing up and the corners flat. Next, place the basket exterior on top with the side seams facing down.
The side seams on both pieces should be lined up.
Pin the corners together and then sew right on top of the previous stitching.
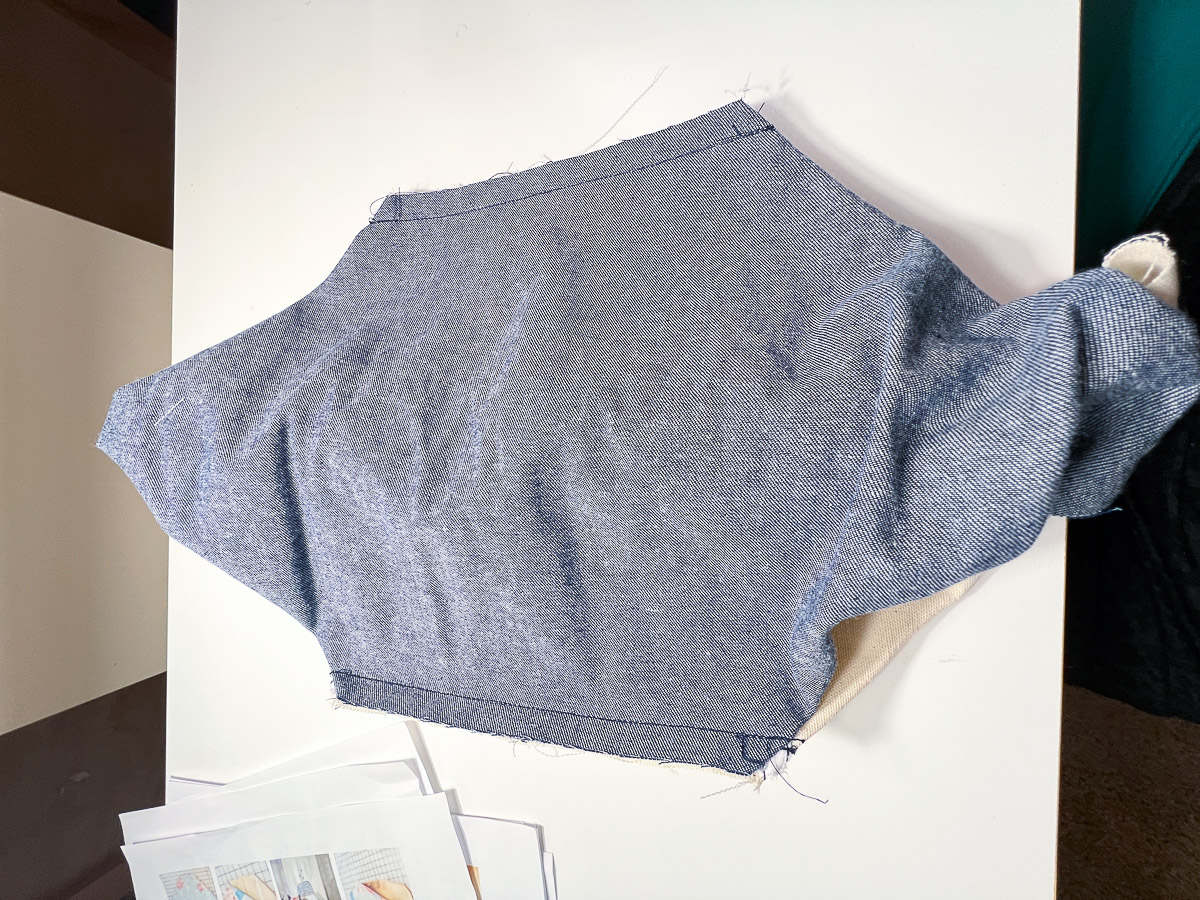
Turn the pieces so that the bottoms are together and the right sides of the exterior and lining are facing out.
Fold the basket exterior up and around the lining so that the right side of the exterior is facing out and the right side of the lining is showing inside the basket.
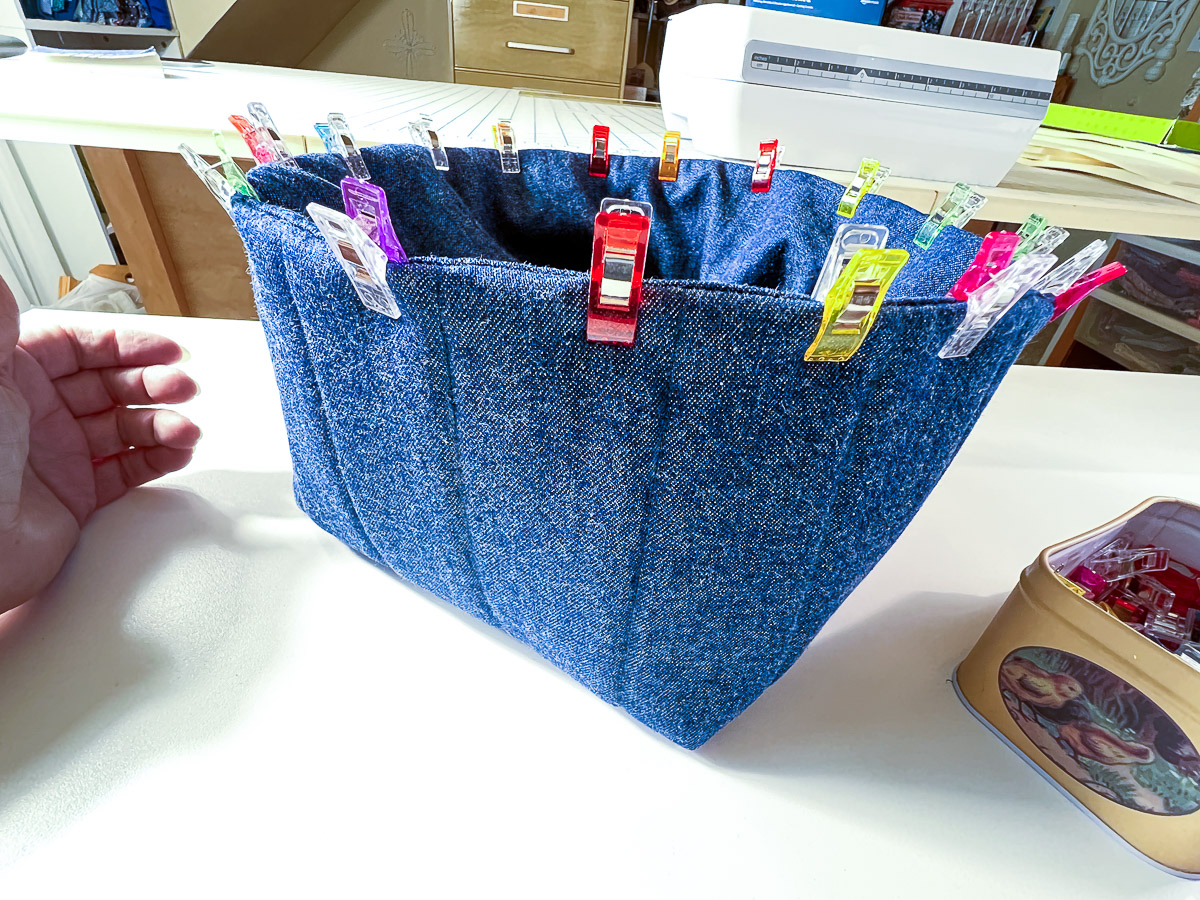
Line up the top edges of the exterior and lining. Pin.
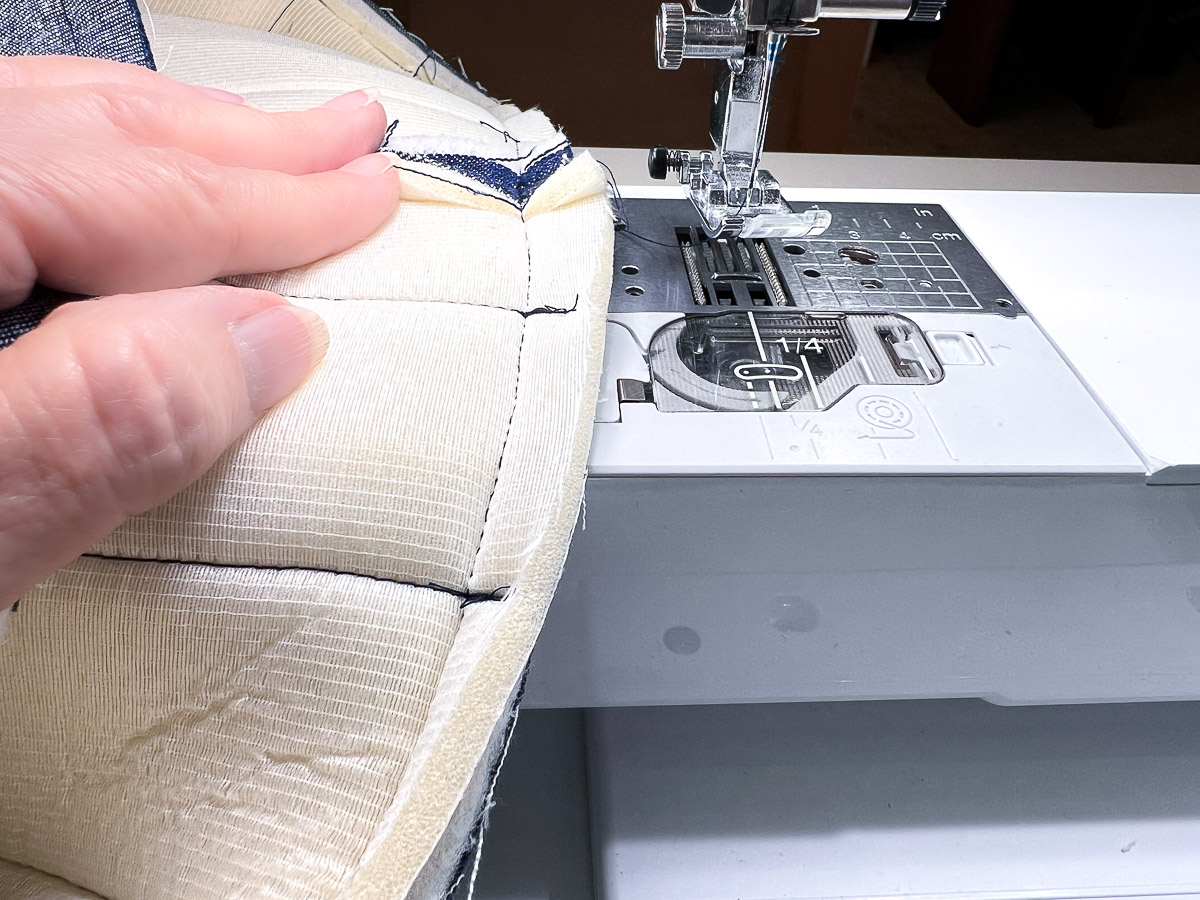
Stitch around the top edges to hold them together, 1/4” away from the top.
Finish the top edge of the basket
The basket is finished with a 1/2” hem that holds the wire rim. Start by folding the top edge to the inside by 1/2” – right along the line of stitching that holds the layers together. Sew all the way around the basket close to the fold.
Prepare the wire piece by curving it into a rectangle that is roughly the same shape as the basket. You will curve it to the correct shape later.
Fold the top edge of the basket down over the wire by about 1/2” and use the Wonderclips to hold the hem and the wire in place. It’s really very easy.
Work your way around the basket, folding the top edge down over the wire and clipping them in place. The ends of the wire will overlap inside the casing. Don’t worry about securing the wire ends together. They are fine with some wiggle room so you can mold the basket top to the perfect shape later.
Sew the casing down right on top of the previous line of stitching.
As you sew around the basket, you will sew over the top ends of the boning at the corners. Go slow and make sure you are using a denim needle.
When finished, sewing all the way around the top edge, form the wire rim in shape and you are done.
This was my least favorite basket although it holds up nicely with the wire and the boning!
Basket #3
Fabric – 1/2 yard
Fabric for lining – 1/2 yard
Chalk marker or fabric marking pen
Heavy duty needle, 90/14 or larger
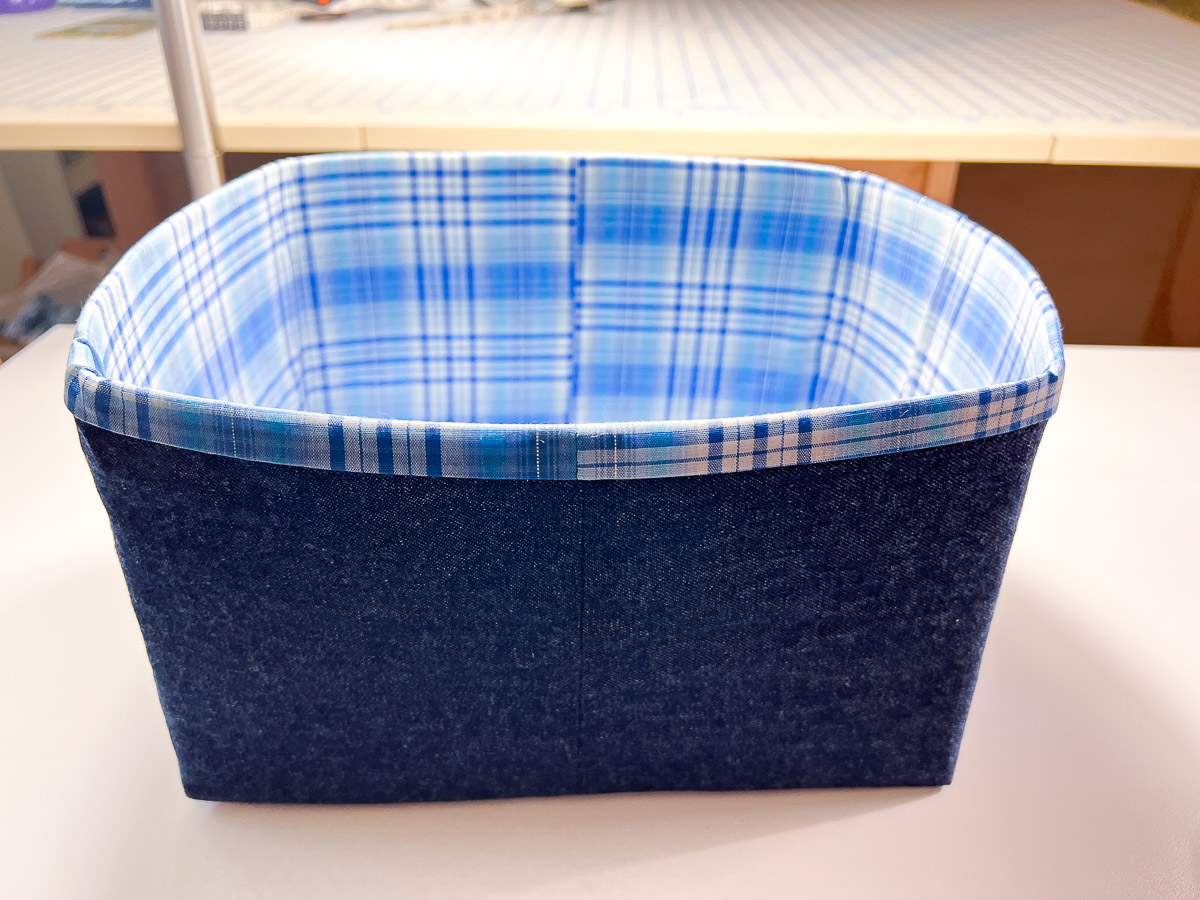
This basket had custom sizing available. I really liked that as I was making one to fit my space. It turned out to be the most sturdy also. Winner, winner, chicken dinner.
The first step is to determine the width, height, and depth that you want your finished basket to be. The width is the dimension across the front of your basket, the height is how tall it stands and the depth is the dimension across the side.
Write down your dimensions, and draw out the diagrams for each piece as you go. You will have three diagrams, one for your main outer fabric, your lining fabric, and the Peltex interior. All measurements and math are based on a 1/2” seam allowance.
Main Outer Fabric
Cutting Width = Width of basket + depth of basket + 1”
Cutting Height = Height of basket multiplied by 2 + depth of basket
Cut Out Width = Half the depth of basket
Cut Out Height = Depth of basket minus 1”
Lining Fabric
Cutting Width = Same cutting width as main outer fabric
Cutting Height = *Cutting height of main outer fabric + 2”
Cut Out Width = Same as main outer fabric
Cut Out Height = Same as main outer fabric
Peltex Interior
Cutting Width = Width of basket + depth of basket
Cutting Height = Height of basket multiplied by 2 + depth of basket
Cut Out Width = Half the depth of basket
Cut Out Height = Depth of basket
Using these measurements, you can create your very own custom size.
*On the lining, the measurements are based on a half inch fold-over. The lining is cut 2” taller than the outer fabric to account for one inch on either side. If you want a larger fold-over, determine the finished height you would like the fold-over to be, multiply it by four, and add this measurement to your main outer fabric cutting height to determine your lining fabric cutting height. The above has 1/2” folded in half, then another 1/2” folded over.
Cutting directions
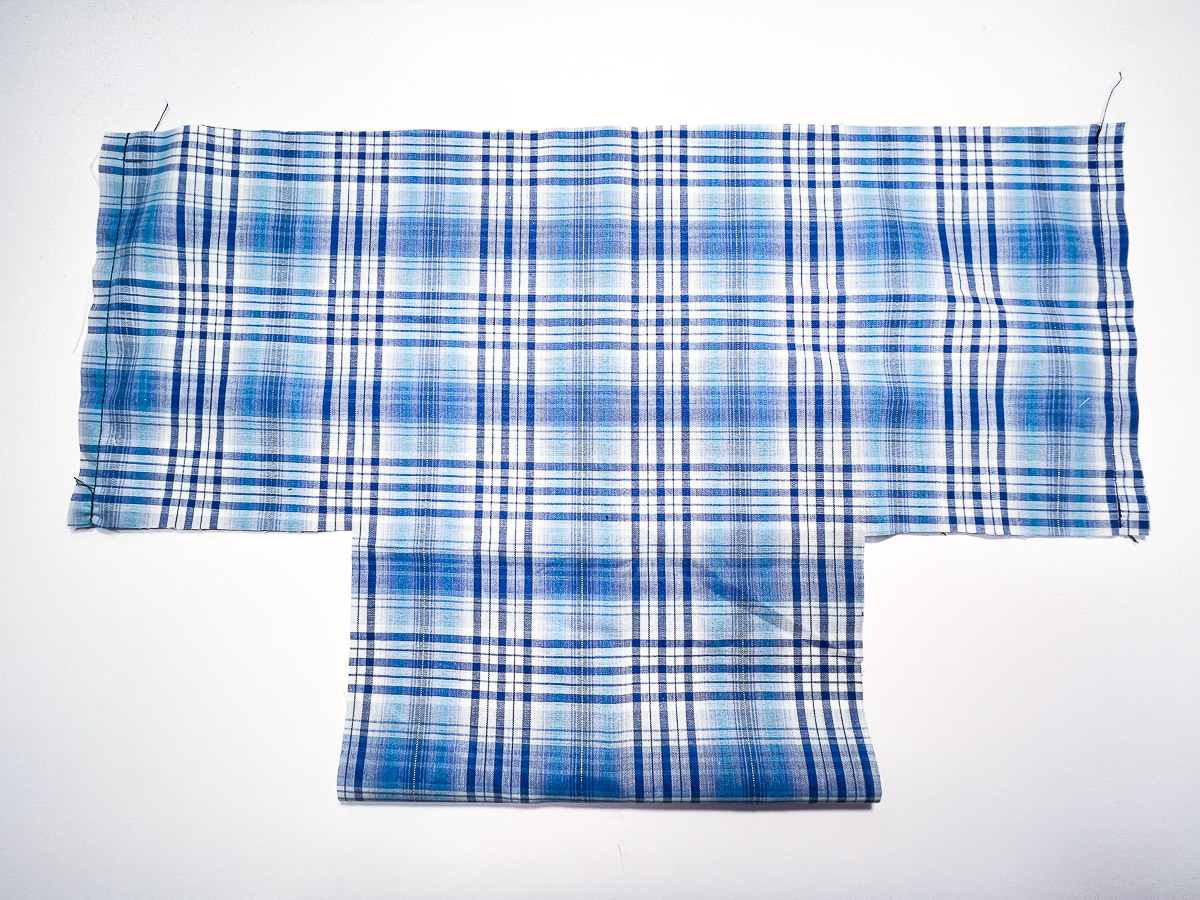
Cut out the main fabric to your dimensions.
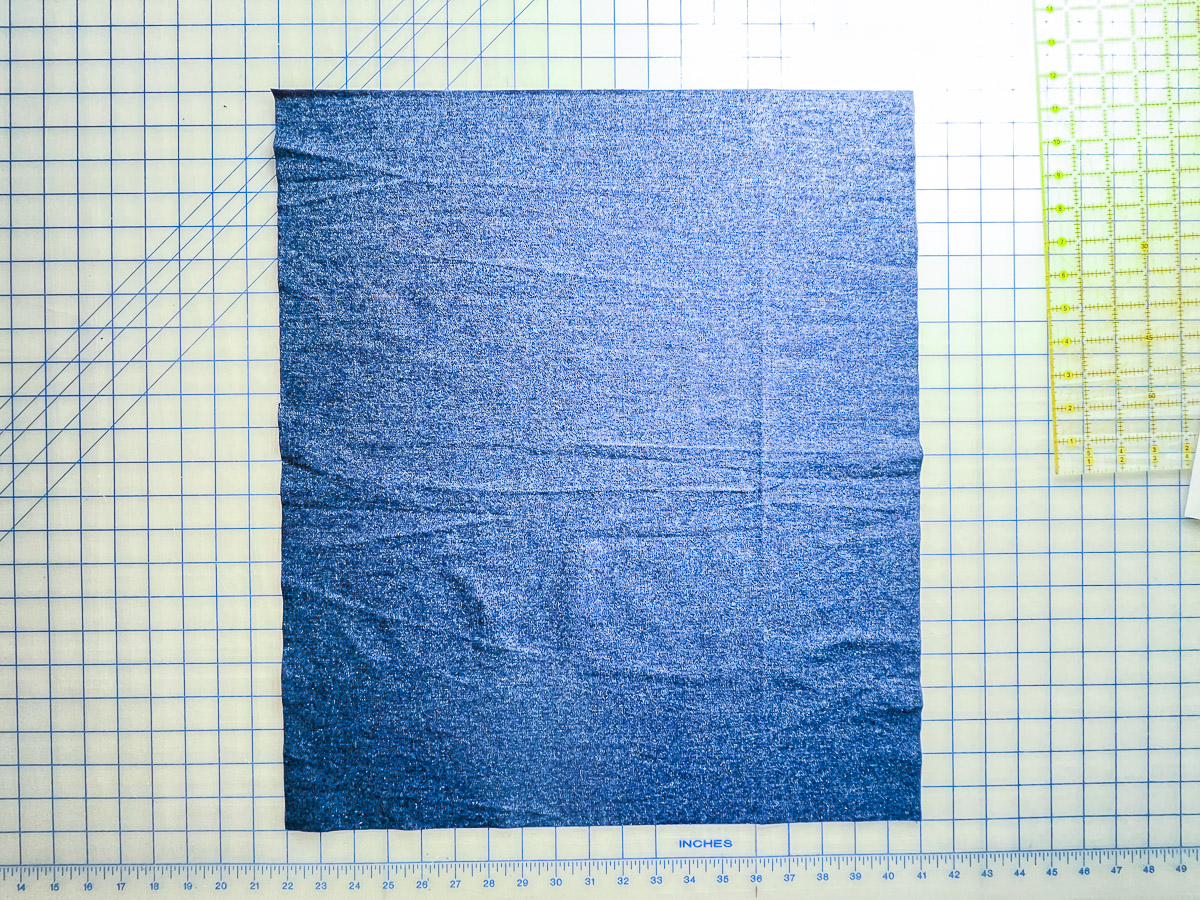
You will see about 1/2” on the outside of the basket of the lining fabric, so a smaller print is best.
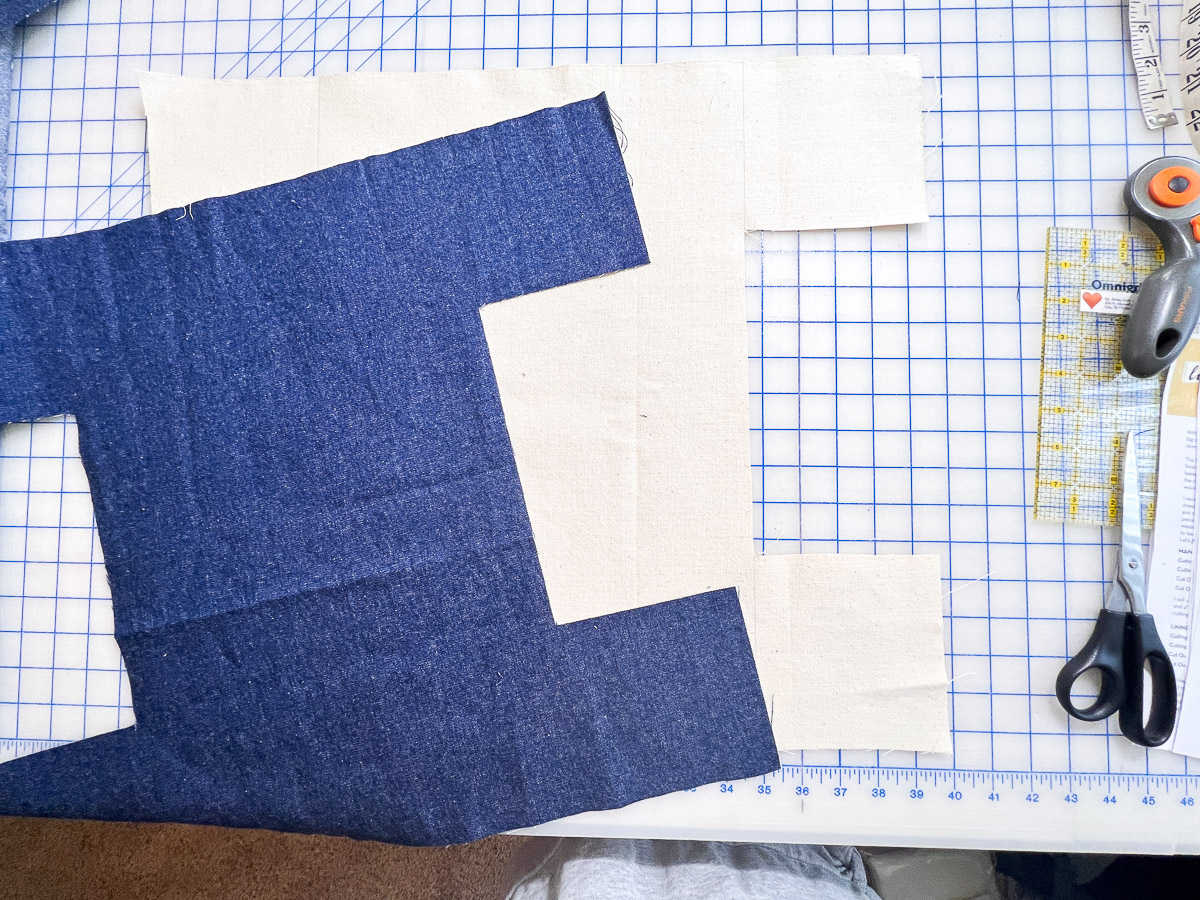
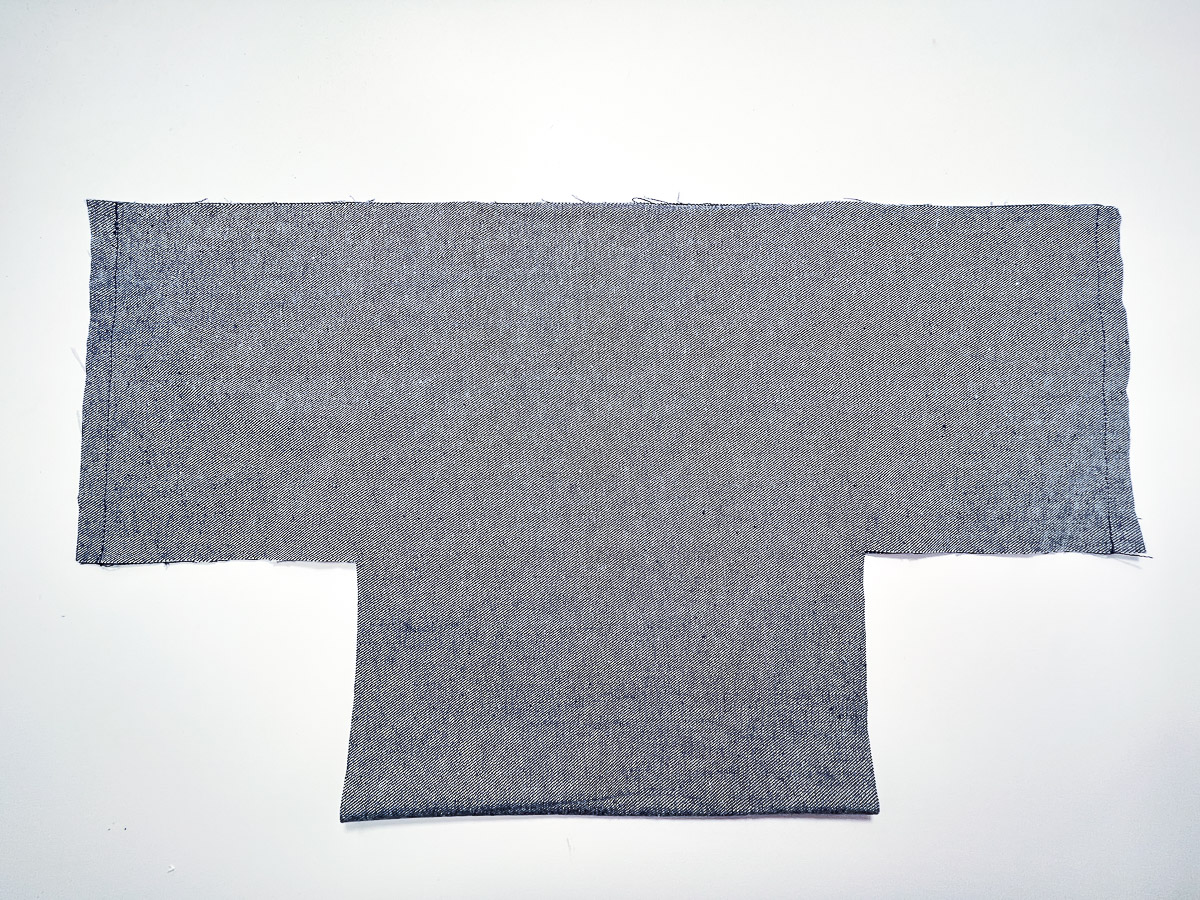
Fold the main fabric in half with right sides together, and mark the center of the longest dimension. Make a pattern piece or just use your measurements to cut out the cut out width and the cut out height. Cut the outer fabric and the lining fabrics.
Peltex
On the Peltex, cut out the measurements of the cut out width and the cut out height for the Peltex measurements after cutting out the size you need.
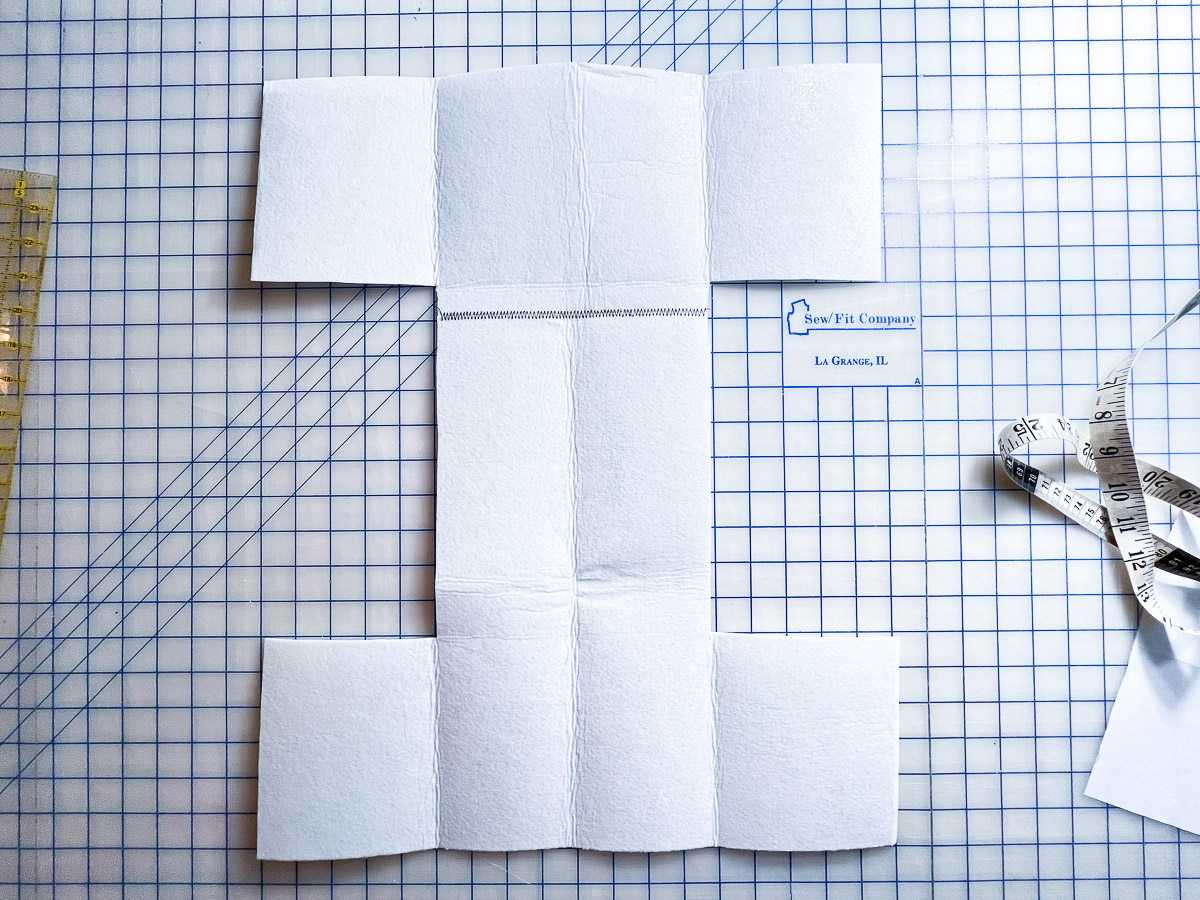
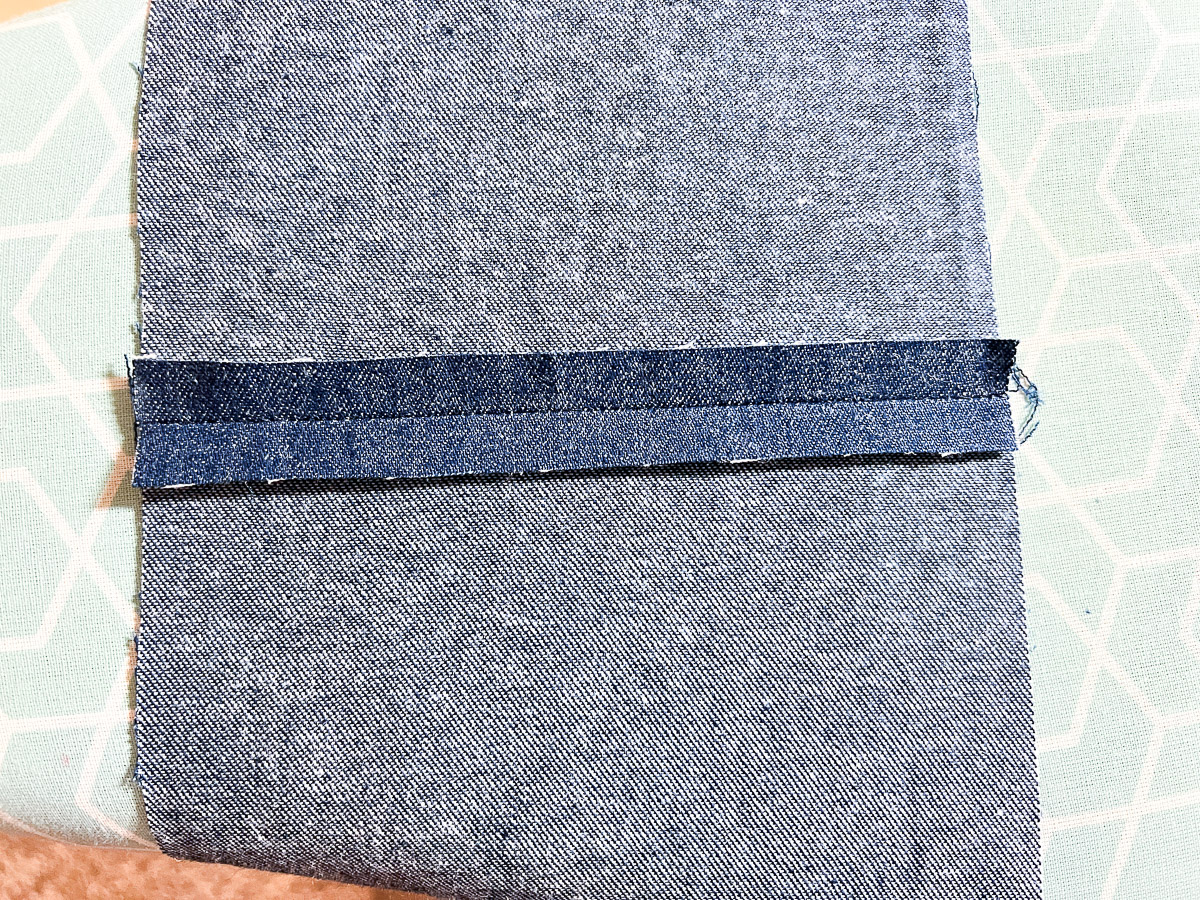
I failed to order the right width of what I needed, therefore, I had to piece it together. It was more cost effective.
Constructing the basket
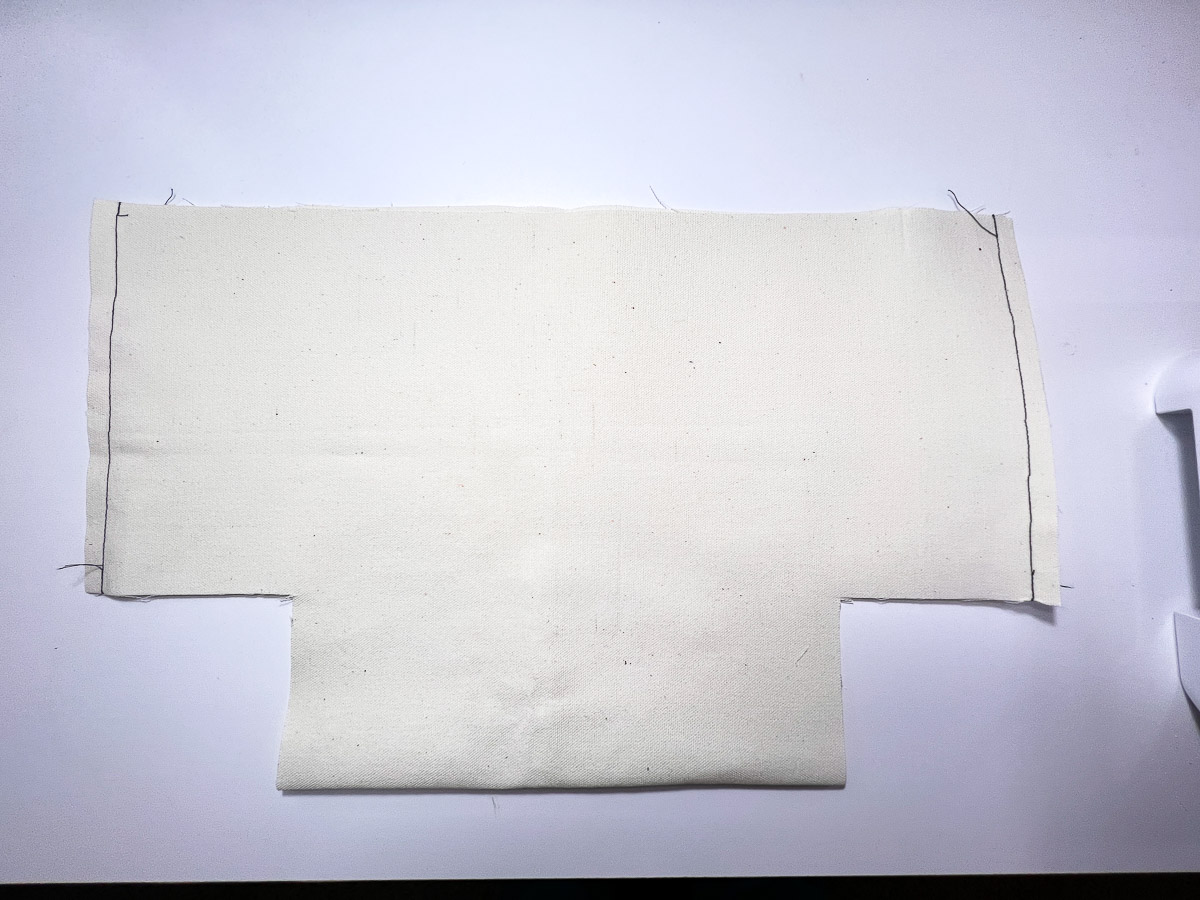
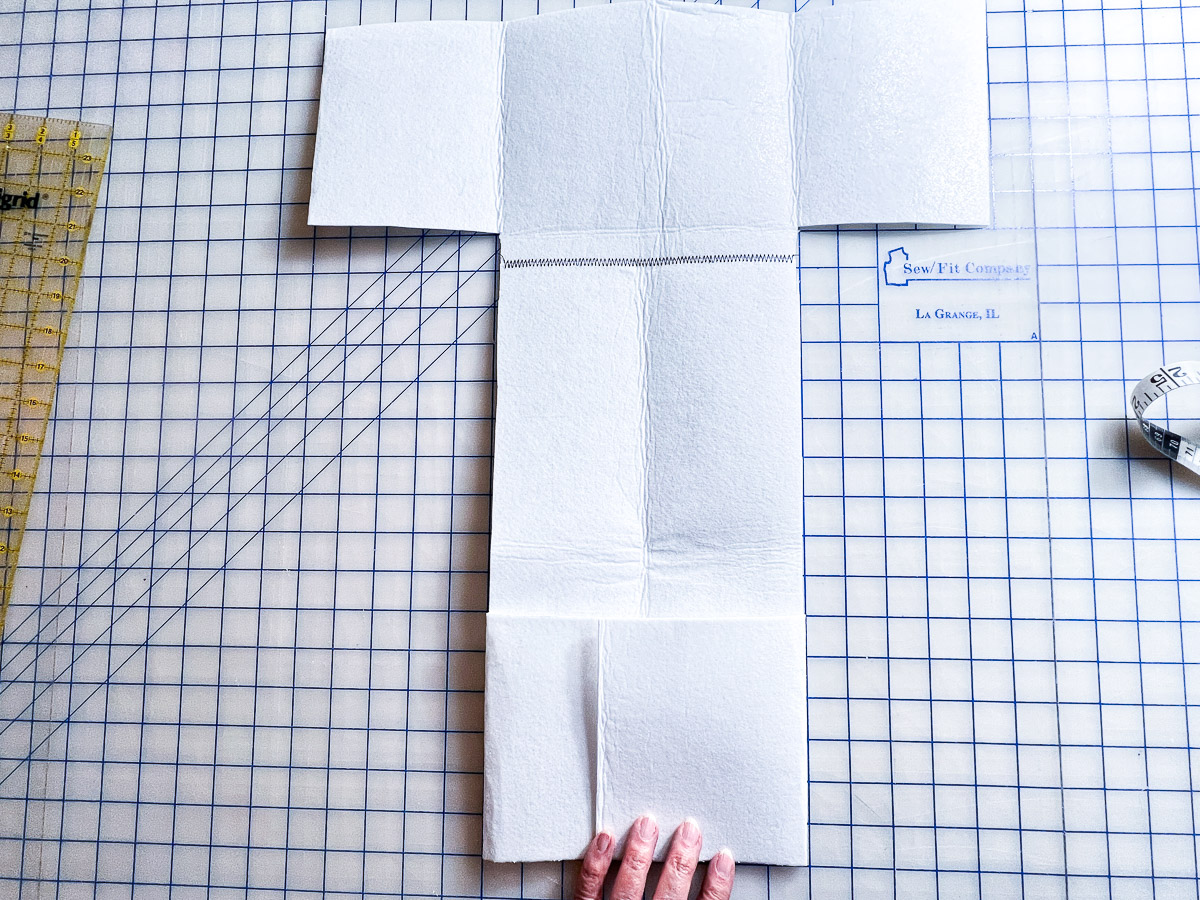
Fold the main fabric in half, with right sides together, lining up the top edges. Sew the two short sides with a 1/2” seam. Press seams open.
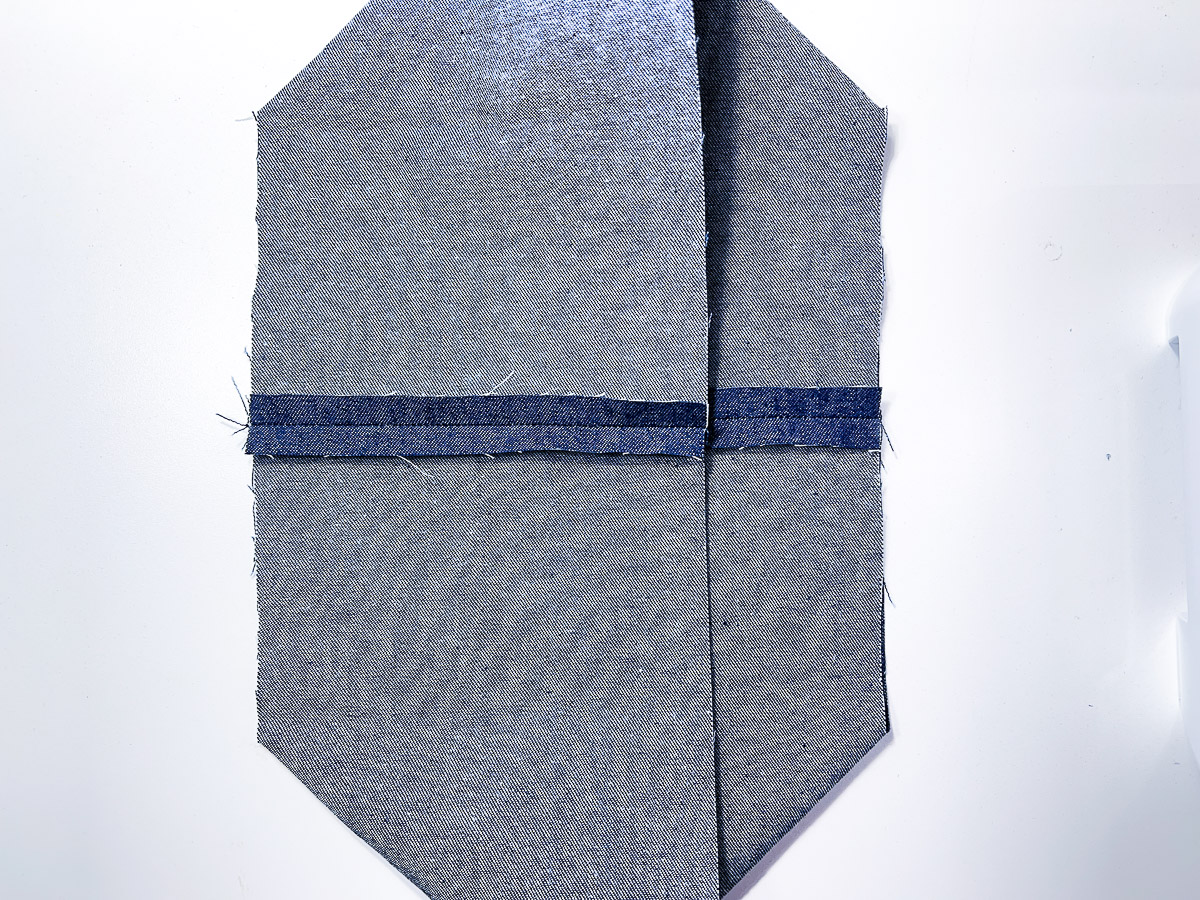
Next, open up your piece with the center of your fabric (where your fold just was) flat on the table. Fold one side seam side in towards the center laying flat along the middle section of the fabric, lining up the bottom side openings and sew with a 1/2” seam. Repeat with the other side. Turn your piece right side out.
Lining
Repeat the above steps with the lining fabric but leave inside out. Press the top edge over, wrong sides together, 1/2” and set aside.
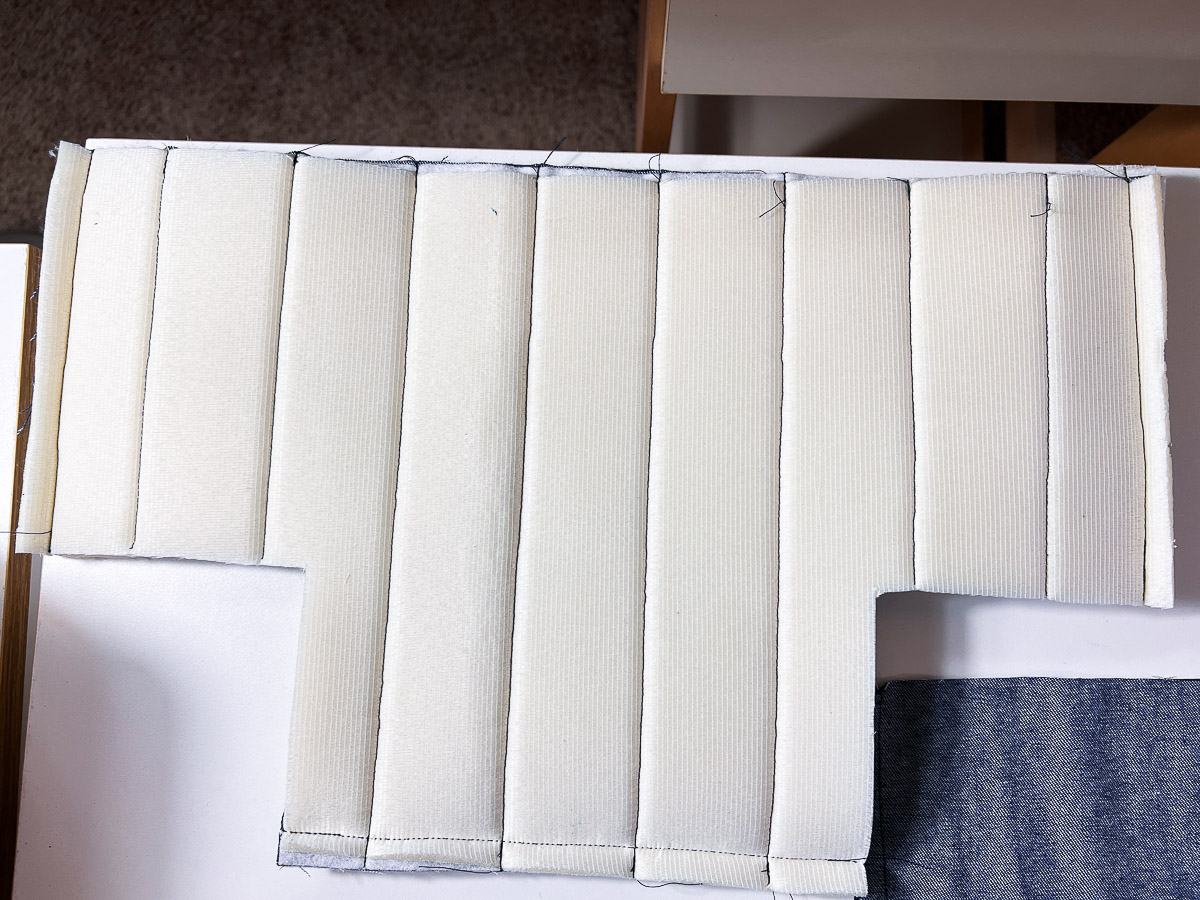
Peltex
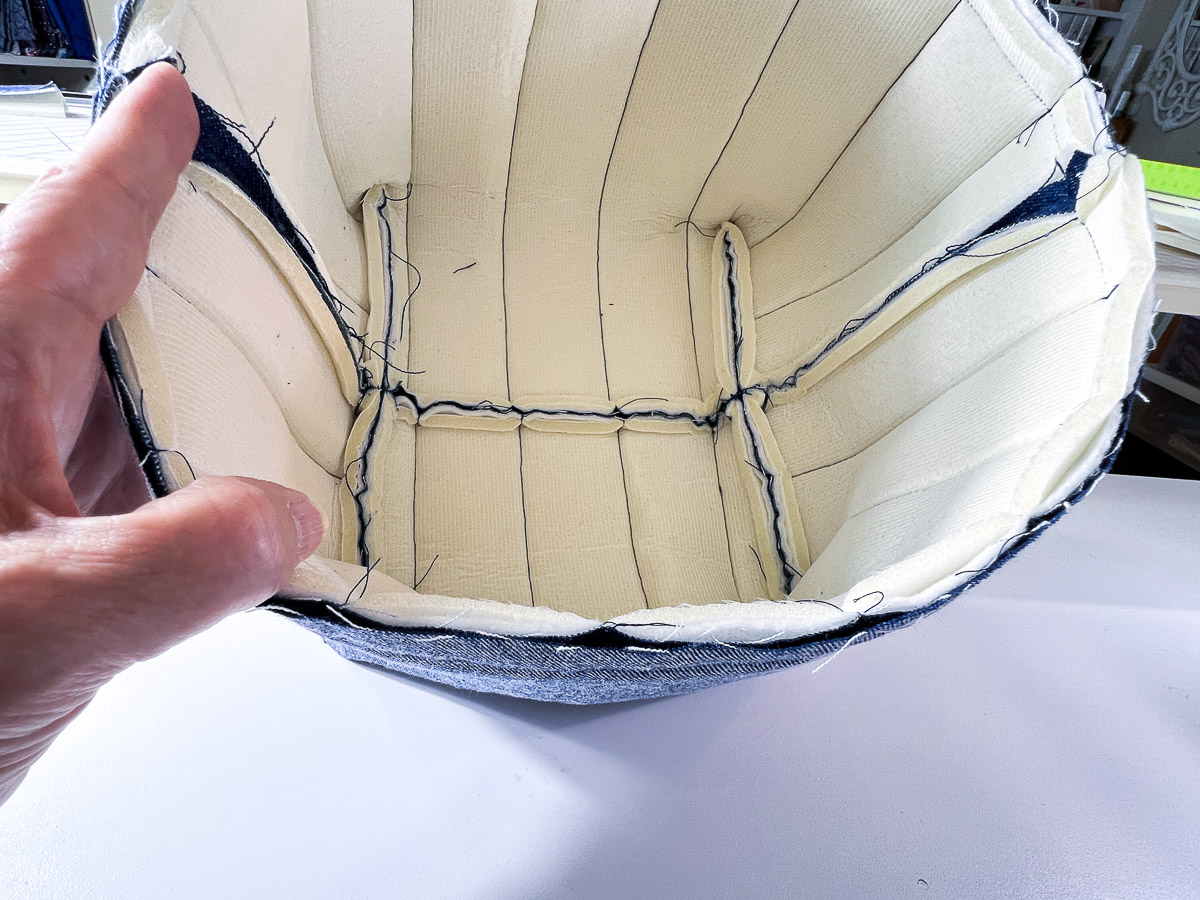
Next, take your Peltex and firmly finger press a crease at each of the ‘seams’ making sure to keep the fusible side out. This helps form the basket shape. You can leave it folded up under a heavy book for several hours or overnight to help press the seams crisp.
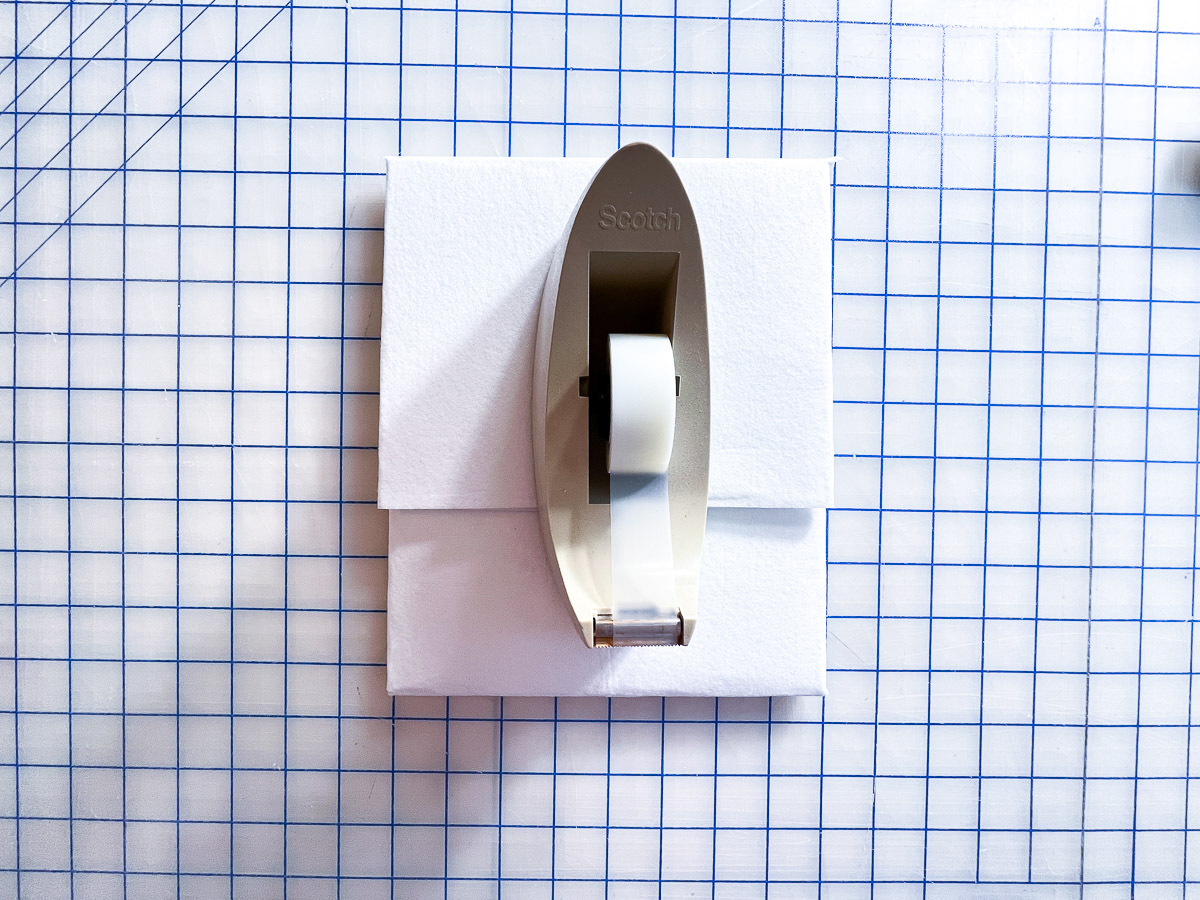
You can sew the side flaps together for extra stability. Fold the Peltex up into the basket shape with the fusible side out. Butt the edges of the side flaps up against each other and sew a few stitches at the top and where it meets the bottom.
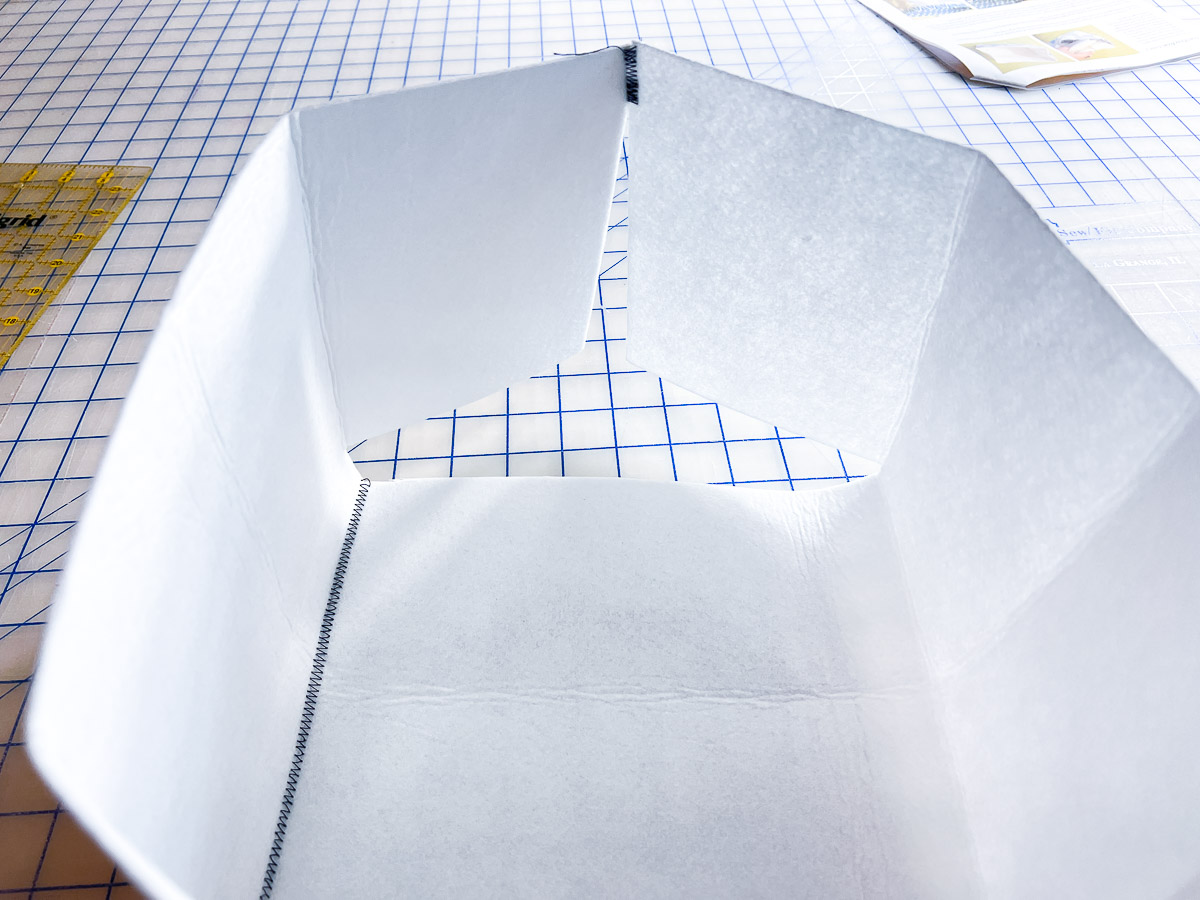
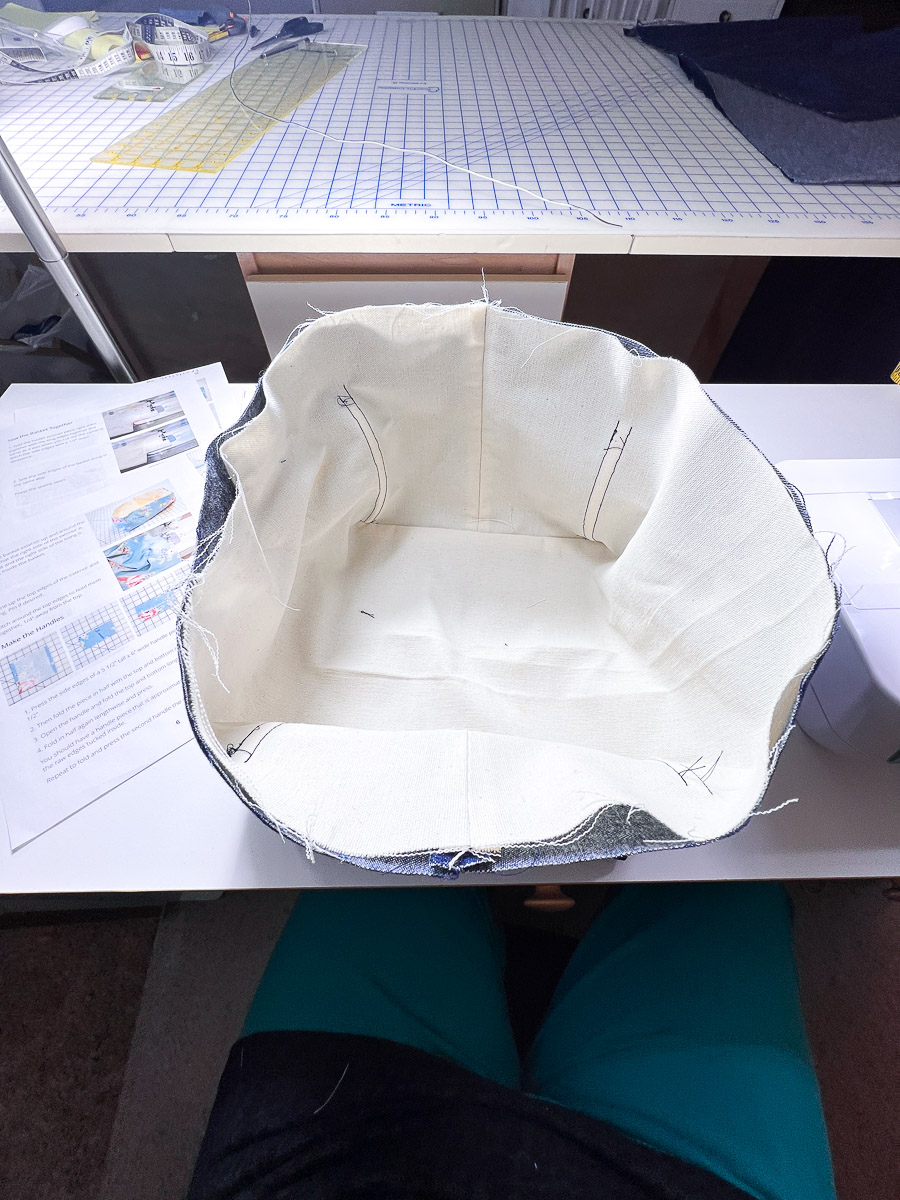
If you did not sew the side seams, fold all sides of the Peltex into the center and insert into your main fabric body. If you did stitch the Peltex, pull the fabric up around it. Open up the Peltex and adjust the placement as needed. Be sure to push it tight into the corners and seams and gently pull your fabric up from the outside to get a tight fit. Clip with your wonderclips.
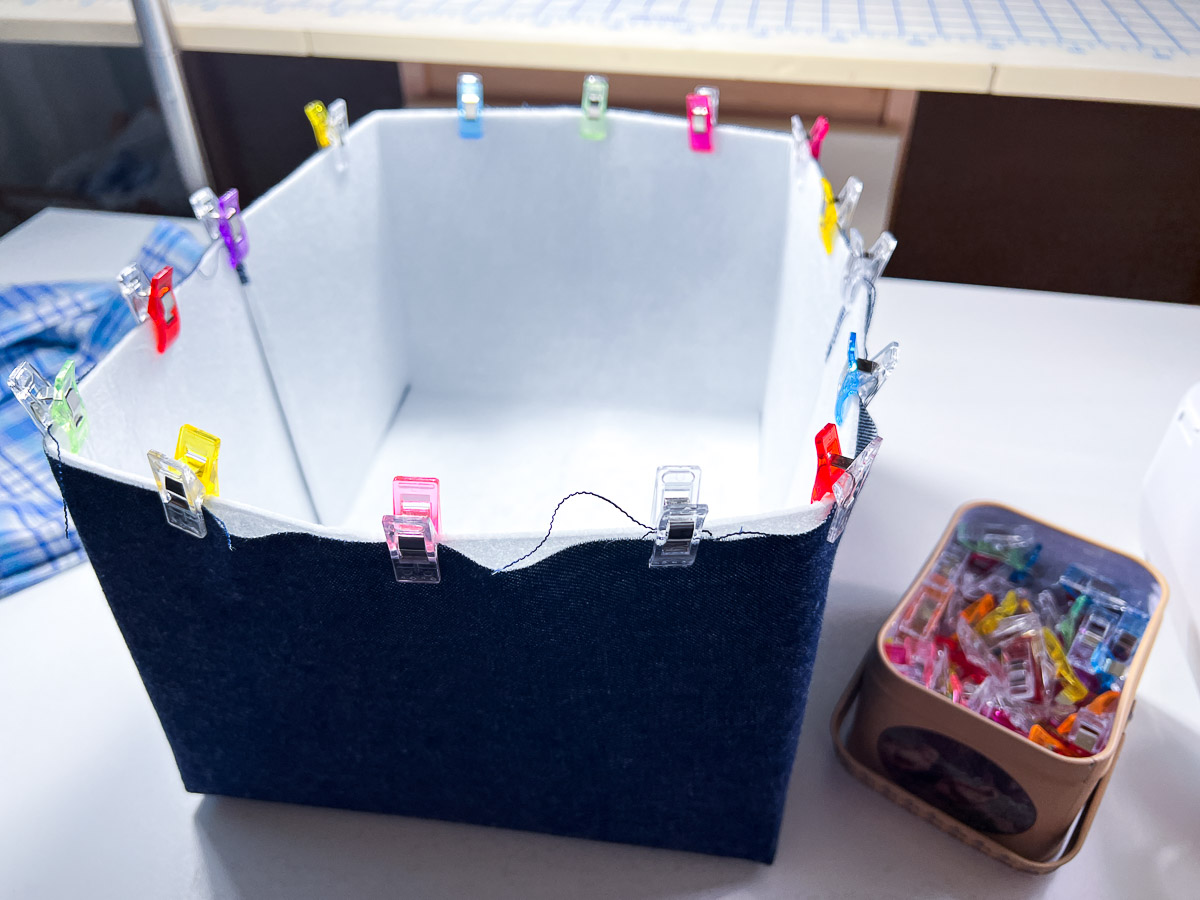
Finishing
Once it’s in place, hold a folded towel, oven mitt, or a pressing ham inside your basket and press with a hot steam iron from the outside against your hand, one side at a time, to fuse the fabric to the Peltex.
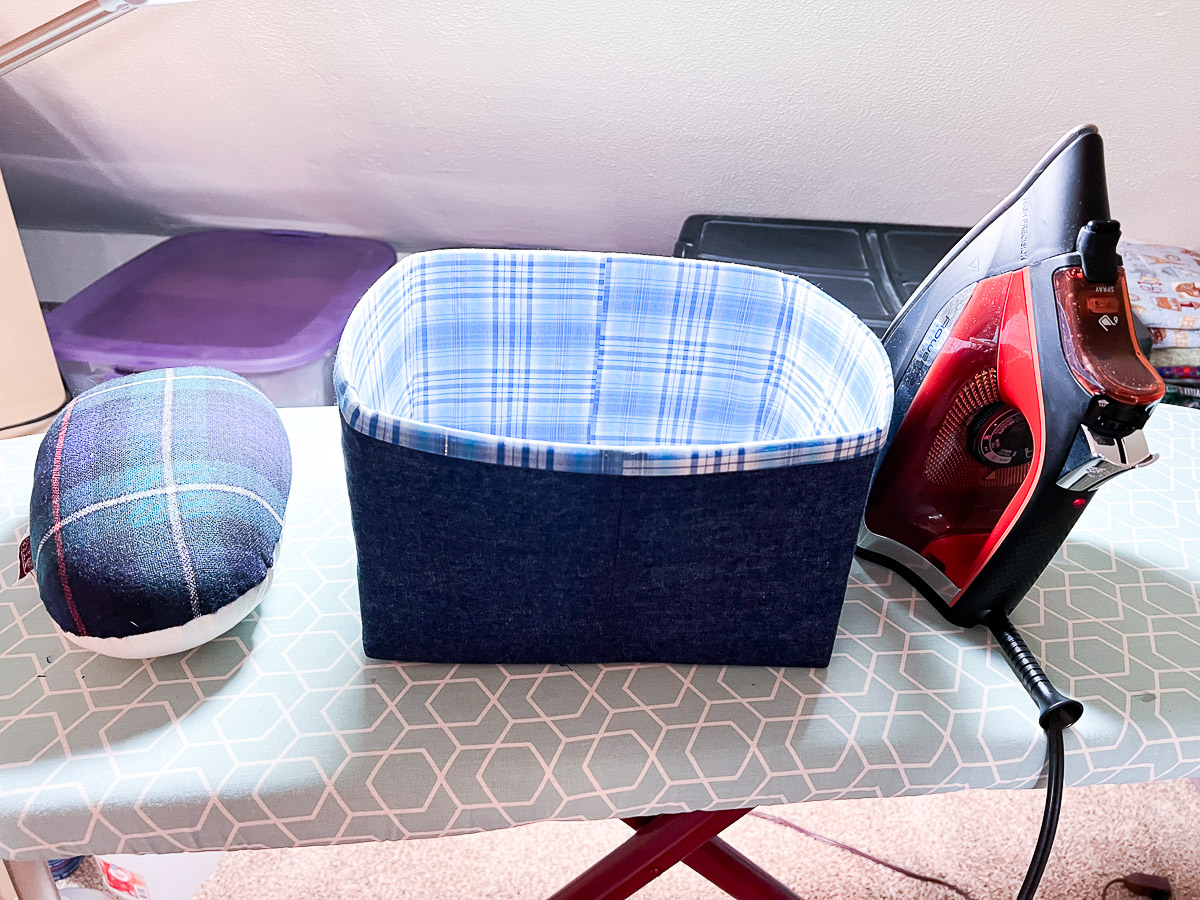
Next, insert your lining into the basket, once again pushing tight into the seams and adjusting as necessary. The lining should extend up over the top edge of the basket a bit over 1/2”.
Fold the lining down over the edge of the basket. You now have a few options for finishing this step. You can top stitch in place using your machine, but its a bit tricky in the corners. Alternately, you can create a more decorative stitch by hand with embroidery floss or for a clean look, you can use a bit of fabric or Elmer’s glue along the top rim of the basket before folding the lining over. This is a cleaner finish.
Optionally, you can sew a seam at the top, however, it was really tricky to do. I didn’t do a very good job because it was sooo sturdy.

You can attach leather handles for a complete finish. Punch 4 holes through each end using a small hole punch or awl. Use embroidery floss (4 strands) to add the handles.
This basket makes a nice gift basket or a great organization basket for your sewing room or any room in the house for that matter.
Sharing is Caring: Save for Later: