
Self binding minky blanket tutorial
Self-binding minky blanket tutorial
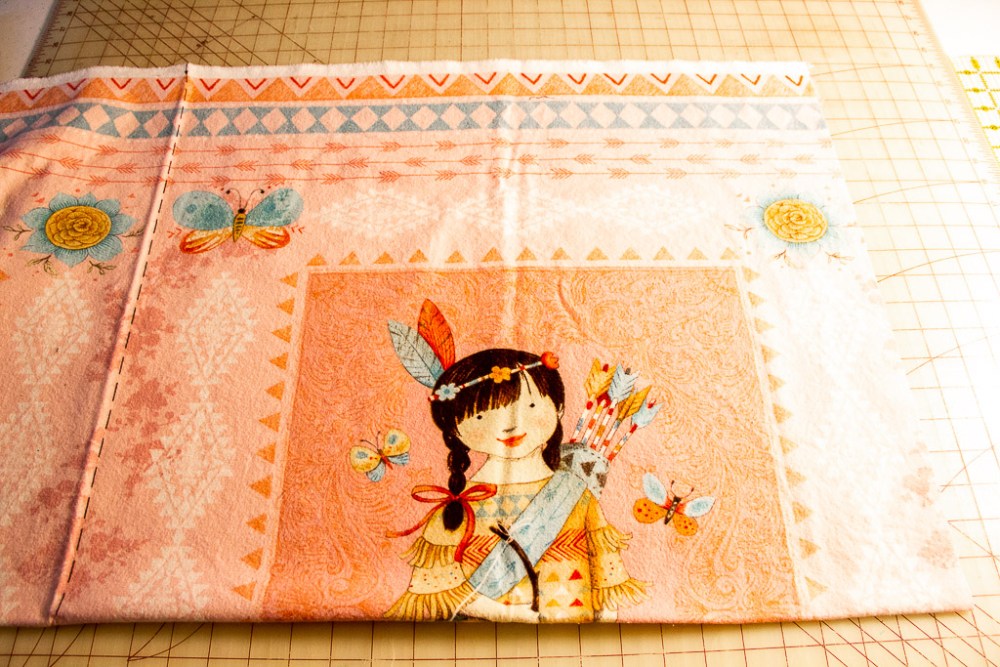
I could not resist this adorable fabric panel. Isn’t it the cutest thing ever? But – what to do with it? My granddaughter stole her Mom’s huge SOFT blanket, claimed it, and brings it with her to our house everyday for her nap. She loves to sleep with it at night also. I wanted to make her a smaller version, therefore, I ordered some minky fabric for its softness. It needed to be on the binding because she loves to run her fingers over it. Join me on this self-binding minky blanket tutorial journey.

Supplies Needed:
Front Fabric – minky or flannel
Back Fabric – minky
OR Scissors
Thread
Prepare the front and back fabrics:
My panel is flannel. Haha that rhymes. Flannel shrinks so I did prewash my fabric.
Cut the edges all straight and even. For perfection – use a rotary mat, rotary cutter, and a quilters ruler. Measure the length and width of your fabric. If you don’t have a panel, cut your fabric 30” by 40”. My panel measured 23” x 39 1/2”.

For the backing (the minky) – Add 8” to each side. It ends up being 4” more on each side. The side with the most stretch needs to be on the longer side. My backing measured 31” x 47 1/2” with the stretch being the 47 1/2” side. Square off one end.

Measure and mark the center of each side of the front and the back. Put a pin in it.

Join the pieces:
Put front and back right sides together. Match the centers on each side and pin.
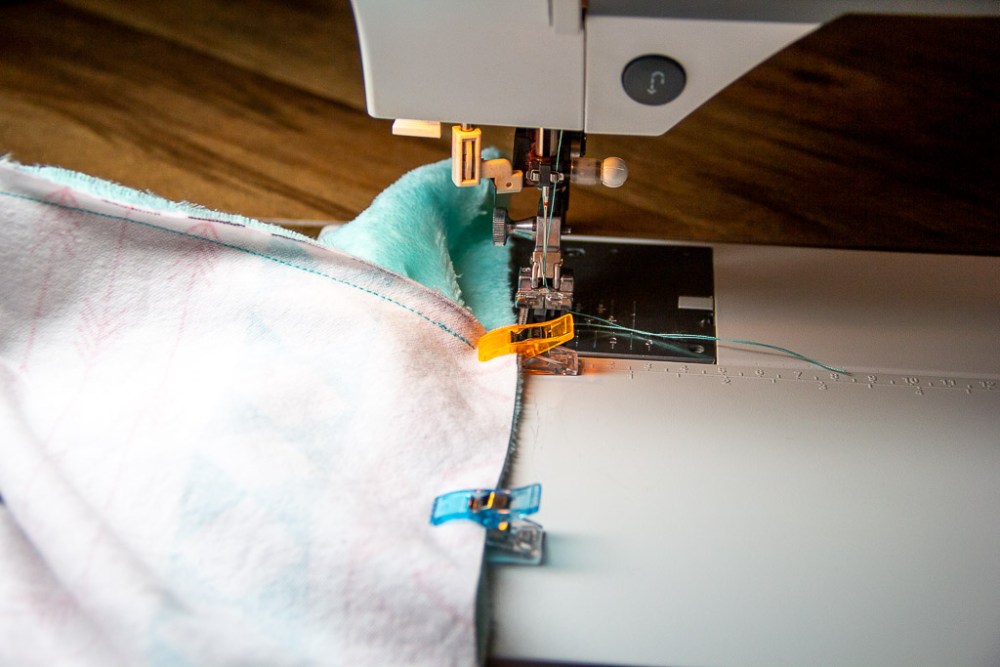
Start sewing the self binding minky blanket:
Sew 3/8” seams. Use a jersey or ball point needle and use a stretch stitch. (It looks like a lightning bolt) It helps to sew from the center to one end, then again from the center to the other end. This helps because of the stretch. Stop 3/8” from each end and backstitch.

Repeat on each side. Mark 4″ from end. Put that 4″ mark on the edge of the top fabric. Be sure and keep the extra fabric on the corners out of the way. Leave an 8” opening on a side that doesn’t stretch as much. This opening is for turning it right side out. Don’t turn yet!


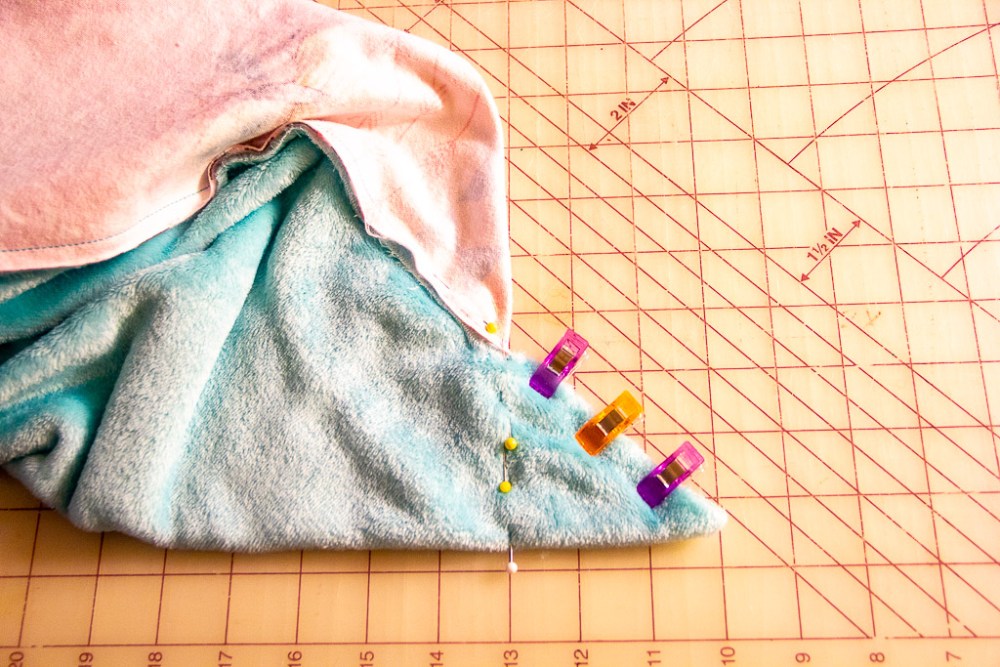
Let’s tackle those mitered corners:
Next, it’s time to create the mitered corners. Lay out and grab the triangle of fabric in each corner.
Fold it in half diagonally. Match up the seam lines on top of each other. Mark the seam with a ruler. It will be a 90 degree angle from the fold. Pin it.

Here is a picture of the seams turned the other way.
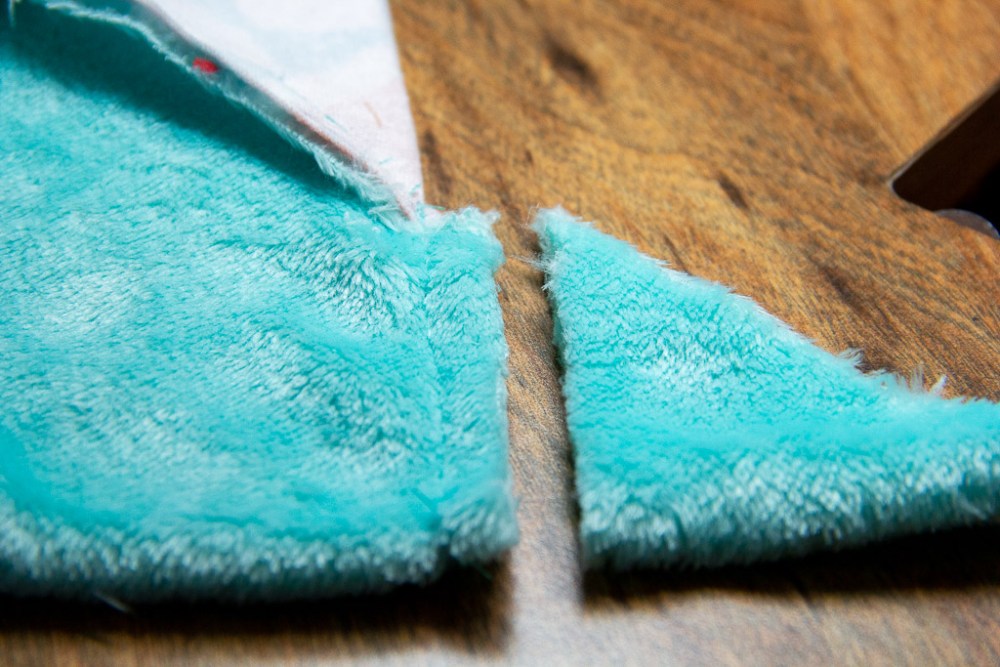
Sew along the mark and trim the excess. Repeat on all four corners.
Turn right side out through the opening. Poke the corners out.

Lay the blanket out evenly on a flat hard surface. Pin the layers together where the seams are.
At the seam opening, turn under 3/8” on top layer and pin down.

Finishing:
Sew a zig-zag stitch over the seams, all the way around the blanket, pivoting at the corners.

If it bunches up, use a press cloth and press down. I have a teflon press sheet that works great!

In conclusion, this method is really pretty fast and easy. This technique can be used on any blanket. And I will let you know if my granddaughter liked it better than the one she stole from her mother…
Pin for later:
Try out this post on how to make a fleece baby blanket with satin binding.


